How to Configure SPF and DKIM for Resend

Quick Answer
To configure SPF and DKIM for Resend, add the DNS records provided in your Resend dashboard, update existing SPF policies if needed, publish DKIM records, and verify authentication. Test emails to confirm SPF, DKIM, and DMARC pass and improve email deliverability.
Why SPF and DKIM Matter for Resend Email Deliverability
SPF and DKIM help inbox providers such as Google, Microsoft, and Yahoo verify that emails sent through Resend are legitimate. SPF authorizes Resend to send emails for your domain, while DKIM adds a digital signature to verify message authenticity and integrity.
Together, SPF and DKIM improve email deliverability, reduce spoofing, and support DMARC enforcement through monitoring, quarantine, or reject policies. They also help protect domain reputation and prepare your domain for BIMI and VMC requirements.
Properly configuring SPF and DKIM for Resend strengthens email security by preventing domain spoofing, reducing phishing risks, and protecting your domain’s reputation against unauthorized email activity.
Prerequisites: Domain Access, DNS Provider, and Resend Account Setup
Before configuring SPF and DKIM for Resend, ensure you have access to your domain’s DNS settings and permission to add or edit TXT records. You also need an active Resend account and access to its dashboard. If you plan to send emails programmatically, keep your API Key ready. Go to the Domains tab and add your domain to generate the required DNS records for verification, SPF, DKIM, and return-path alignment.
Decide whether to authenticate your root domain (e.g., example.com) or a subdomain (e.g., mail.example.com). Using a subdomain helps separate transactional emails from regular business emails. Before making changes, review existing SPF, DKIM, DMARC, MX, and TXT records to avoid configuration conflicts.
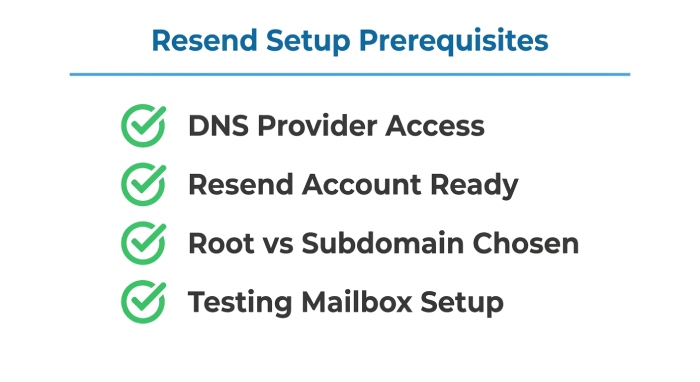
A few prerequisites to confirm:
- You can edit DNS records at your DNS Provider.
- You can access the Resend Dashboard and Domains Tab.
- You understand whether Resend will send from the root domain or a subdomain.
- You can identify existing TXT record, MX Record, and DMARC entries.
- You have a mailbox available for testing email delivery and reviewing email headers.
Tools such as Email Labs, DmarcDkim.com, DMARC Checker, Open-SPF.org, and dkim.org can help validate email authentication after setup. Resend Guides are also useful when comparing the generated record value with what appears in your DNS zone.
How to Configure SPF for Resend in Your DNS Records
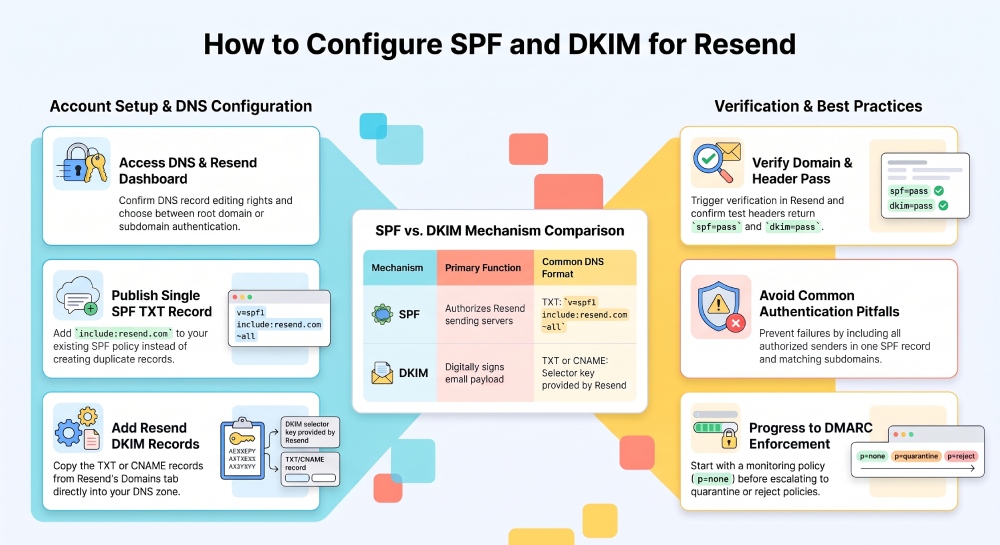
To configure SPF for Resend, publish or update a TXT record to authorize its sending servers. Open the Domains Tab in your Resend Dashboard, select your domain, and copy the required DNS record. If an SPF record already exists, update it instead of creating a second one to avoid authentication failures.
SPF setup step-by-step
- Log in to your DNS Provider, such as Cloudflare or AWS Route 53.
- Find the DNS zone for your root domain or subdomain.
- Locate any existing TXT record beginning with
v=spf1. - If no SPF record exists, create a new TXT record using the value provided by Resend.
- If an SPF record already exists, merge Resend into the existing Sender Policy Framework policy.
- Save the DNS records and wait for propagation.
- Return to Resend and use verify DNS records to check domain verification.
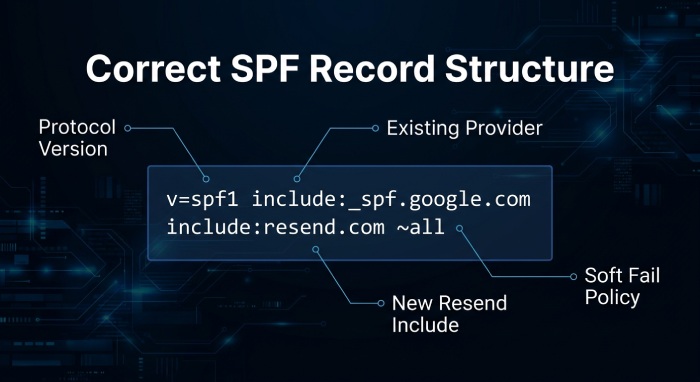
A typical SPF TXT record might look like this:
v=spf1 include:resend.com ~allThe exact record value should come from Resend because sending requirements may change. If you also send mail through Google Workspace, Amazon SES, or another email provider, the Sender Policy Framework policy must include those authorized senders as well. For example, a domain using Google and Amazon SES may need multiple include mechanisms in one SPF TXT record.
Avoid ending with +all, which allows almost any mail server to send on behalf of your domain. A soft fail such as ~all is often used during setup, while -all is stricter. Your final SPF stance should align with your DMARC policy, domain reputation goals, and operational risk tolerance.
How to Configure DKIM for Resend and Verify Domain Authentication
To configure DKIM in Resend, publish the required DNS records containing public keys to authenticate outgoing emails. Open the Domains Tab in your Resend Dashboard, select your domain, and add the provided TXT or CNAME records exactly as displayed.
DKIM and domain verification checks
After adding the DKIM DNS records, return to Resend and click verify DNS records. If the DNS records are correct and propagation is complete, Resend will mark the domain as a Verified Domain. At that point, domain authentication should show as passing for DKIM.
When testing, send a message from your application or via the Resend API Key to a mailbox hosted by Google or another Inbox Provider. Open the message details and inspect the email headers. Look for:
dkim=passspf=passdmarc=passonce DMARC is configured- A valid DKIM signature
- Alignment between the visible From domain and authenticated domain
- A return-path that aligns with your authenticated sending domain if configured
DKIM is especially important because SPF can break when mail is forwarded. DomainKeys Identified Mail survives many forwarding scenarios because the digital signature remains attached to the message. However, DKIM can fail if a system modifies signed content, subject lines, or certain email headers after Resend signs the message.
Testing, Troubleshooting, and Maintaining SPF/DKIM Configuration
After configuring SPF and DKIM for Resend, send test emails to major inbox providers to check delivery and verify SPF, DKIM, and DMARC alignment. Use validation tools to identify DNS errors, missing DKIM selectors, and DMARC issues. If DNS verification is delayed, allow time for propagation, which may take several minutes or hours depending on your DNS provider and TTL settings.
Common problems include:
- Creating more than one SPF TXT record for the same hostname.
- Copying the wrong DKIM record value from the Resend Dashboard.
- Adding a TXT record to the root domain when Resend expects it on a subdomain.
- Forgetting to include all authorized senders in Sender Policy Framework.
- Publishing a DMARC reject policy too early.
- Using a quarantine policy without reviewing DMARC report data.
- Changing DNS records in Cloudflare but editing the wrong DNS zone.
- Not checking return-path alignment for transactional email delivery.
Once SPF and DKIM pass, add or refine DMARC. A starter DMARC TXT record can use a monitoring policy:
v=DMARC1; p=none; rua=mailto:dmarc@example.com; pct=100Review DMARC reports and gradually move from p=none to Quarantine and then Reject, using the PCT tag to apply policies in stages. Before enabling BIMI, ensure DMARC enforcement is active and your domain meets the required authentication standards to display a verified brand logo in supported inboxes.
General Manager
General Manager of DuoCircle. Product strategy and commercial lead for AutoSPF's 2,000+ customer base.
LinkedIn Profile →