Rocketseed Login and SPF Setup: A Step-by-Step Guide

Quick Answer
Learn how to log in to Rocketseed and configure SPF correctly with this step-by-step guide. Discover the required SPF record settings, DNS configuration steps, and best practices to improve email authentication and deliverability.
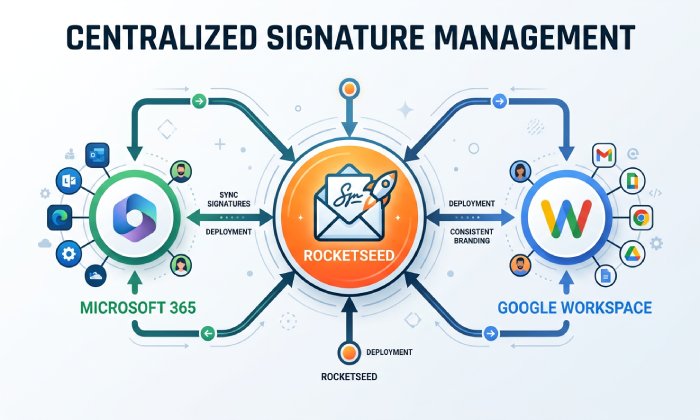
Rocketseed is an email signature management platform that helps organisations centrally manage branded email signatures across business email environments such as Microsoft 365 and Google Workspace. Its server-side deployment can apply centrally managed signatures and other email content without requiring individual users to update their signatures manually.
For organisations using Rocketseed to send or process email, SPF configuration can be an important part of email authentication. A Sender Policy Framework (SPF) record specifies which servers and services are authorised to send email on behalf of a domain. When Rocketseed is required to send mail for your domain, its authorised sending infrastructure may need to be included in your SPF configuration.
Before making any DNS changes, check Rocketseed’s current SPF requirements and review your existing SPF record. This helps prevent configuration conflicts, multiple SPF records, and excessive DNS lookups that can cause SPF authentication failures.
Prerequisites Before You Begin: Account Access, Domain Details, and Admin Permissions
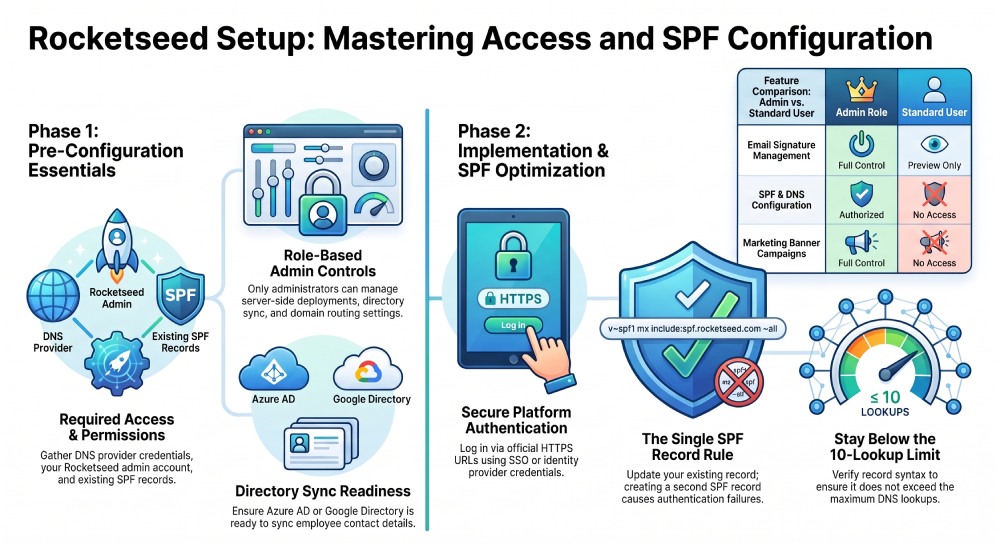
Before attempting your Rocketseed login or configuring SPF, gather the necessary account, domain, and DNS information. You should have access to your Rocketseed account, know which domain or domains send email through Rocketseed, and have access to the DNS provider managing your domain. Also review your existing SPF record and identify any other services that are authorised to send email on your domains behalf.
Account and User Access Requirements
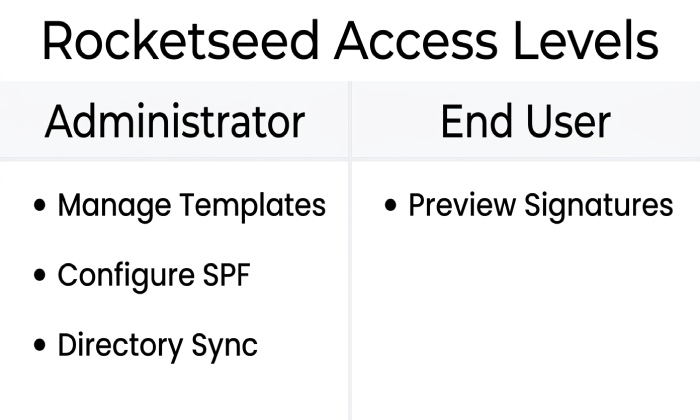
You will need an active Rocketseed administrator account or user account. Administrators typically receive access during onboarding, managed set-up, or Rocketseed Training. If your organization uses a managed service, a dedicated account manager, Rocketseed Customer Service, or Rocketseed 24/7 Support may assist with initial configuration.
For administrators, access may include:
- Managing company email signatures
- Editing branded email templates
- Creating campaigns with marketing banners
- Reviewing real-time analytics and reporting
- Configuring directory sync
- Managing rule-based assignment
- Controlling email branding across teams, brands, and entities
Standard users may only have permission to preview or confirm their employee email signatures, depending on the organizations IT control model.
Domain, DNS, and SPF Requirements
To complete SPF setup, you need access to your domains DNS hosting provider. This may be managed by your internal IT team, MSP, domain registrar, or hosting provider. You should confirm:
- Your sending domain or domains
- Current SPF TXT records
- Microsoft 365, Office 365, Google Workspace, or Exchange mail routing details
- Whether Rocketseed is using cloud deployment or another supported configuration
- Any existing third-party sender records, such as CRM, marketing automation, or support platforms
For organizations with multi-domain management, multi-brand support, or a multi-entity structure, each domain may require review. SPF records must be accurate to avoid authentication failures, delivery delays, or emails being flagged as suspicious.
Directory and Platform Integration Details
Rocketseed can work with directory sync to keep employee names, titles, phone numbers, deparents, and other profile details current. Depending on your environment, this may involve Active Directory sync, Azure AD, Microsoft Entra ID, Google Directory integration, or another user directory sync method.
A proper directory sync ensures contact details sync is reliable and that centrally managed signatures remain accurate. This is especially important for organizations deploying Microsoft 365 signatures, Google Workspace signatures, or using Rocketseed as an Exchange email signature manager. With accurate employee directory data, Rocketseed can apply targeting rules, support rule-based assignment, and generate personalized company-wide signatures using approved template design standards. AutoSPF helps businesses manage and optimise their email authentication records for better email deliverability.
How to Access the Rocketseed Login Page
The Rocketseed login page allows authorised administrators and users to access their Rocketseed account and manage email signature settings. Use the official login URL provided by your organisation or Rocketseed during setup. If you cannot access your account, contact your organisations Rocketseed administrator or Rocketseed support team for assistance.
Finding the Correct Login URL
In most deployments, your administrator or onboarding specialist provides the correct Rocketseed login address. Avoid searching randomly or using unofficial links. For security, always confirm that the URL is legitimate and uses HTTPS.
You may also find access guidance through:
- Rocketseed Knowledge Base
- Rocketseed Blog
- Rocketseed Demo resources
- Rocketseed Pricing or product inquiry pages
- Rocketseed Partners
- Internal IT onboarding documentation
- Support and service emails from Rocketseed
If your company uses SSO or identity provider controls through Azure Cloud, Microsoft Entra ID, Azure AD, or Google Workspace, your Rocketseed login process may redirect through your corporate authentication page.
Admin Console vs. User Access
Rocketseed access may vary by role. Administrators commonly manage email signature management, email signature software configuration, server-side deployment, branded email templates, marketing banners, directory sync, integrations, and CRM integration. Marketing teams may manage email signature marketing, banner campaigns, campaign effectiveness, and integration with Google Analytics. IT teams often control SPF, DNS, routing, Office 365 integration, Gmail signature integration, and Exchange connectors.
End users usually do not need deep platform access because Rocketseed supports centrally managed signatures, no manual updates, and no end-user installs. This is one of the main advantages of server-side deployment for Microsoft 365 signatures, Google Workspace signatures, and an Exchange email signature manager model.
Step-by-Step Rocketseed Login Process for Users and Administrators
The exact steps may differ based on your organizations authentication settings, but the following process applies to most Rocketseed environments.
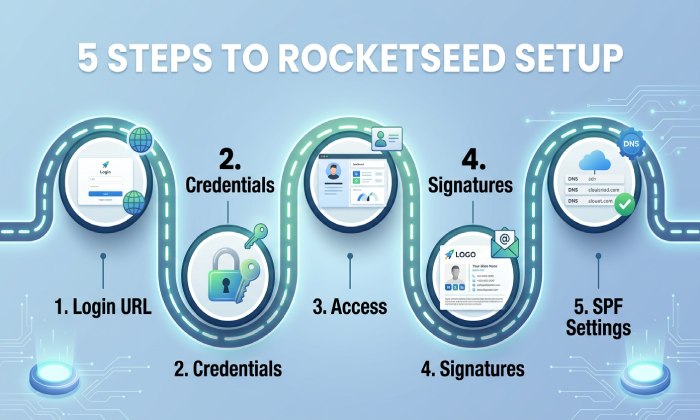
Step 1: Open the Rocketseed Login Page
Open a supported browser and navigate to your organizations official Rocketseed login URL. For best results, use a current version of Chrome, Edge, Safari, or Firefox. If your company requires VPN access or conditional access through Microsoft Entra ID, connect before signing in.
Step 2: Enter Your Credentials
Enter your email address and password, or follow your organizations SSO process. If authentication is integrated with Microsoft 365, Office 365, Azure AD, or Google Workspace, you may be redirected to your identity provider.
Administrators responsible for email signature management should confirm they are using an account with the correct permissions. Without admin rights, you may not see settings for company email signatures, email signature generator tools, email signature software configuration, server-side deployment, or directory sync.
Step 3: Confirm Your Account Access
After signing in, confirm that you have access to the Rocketseed settings required for your organisations email configuration. If you are an administrator, you may be able to manage users, signatures, domains, and email delivery settings.
Once your account access is confirmed, you can work with your IT or DNS administrator to review the domains current SPF record and configure Rocketseed as an authorised sender where required.
Step 4: Check Signature and Banner Configuration
Administrators should confirm that centrally managed signatures are active for the right users, deparents, domains, and brands. For example, a company using Microsoft 365 signatures may have different branded email templates for sales, support, legal, and executive teams. A Google Workspace business may use Google Workspace signatures with Gmail signature integration and deparent-specific marketing banners.
If Rocketseed is deployed as an Exchange email signature manager, confirm routing and connectors are functioning correctly. The value of server-side deployment is that users cannot accidentally remove the signature, change the disclaimer, or break the format in Outlook.
Step 5: Confirm SPF and Mail Flow Settings
Once you have access to the Rocketseed account, work with your IT or DNS administrator to review your domains existing SPF record. Make sure the record authorises all legitimate services that send email on behalf of your domain, including Microsoft 365, Google Workspace, CRM platforms, and Rocketseed, where required by your Rocketseed configuration.
If your domain already has an SPF record, update the existing record rather than creating a second one. A domain should have only one SPF record to avoid SPF authentication errors.
After updating the record, verify its syntax and confirm that it remains within the SPF 10-DNS-lookup limit. Monitoring the record after deployment can help identify configuration issues that may affect email authentication and deliverability.
General Manager
General Manager of DuoCircle. Product strategy and commercial lead for AutoSPF's 2,000+ customer base.
LinkedIn Profile →