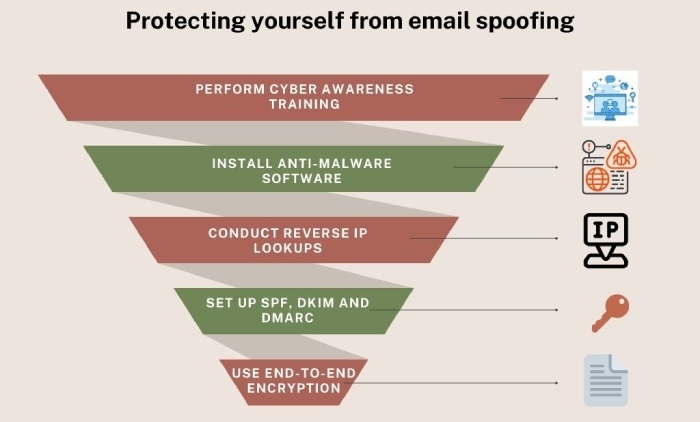
From the outside, email delivery might seem pretty straightforward—simply type, send, and done! But what goes on behind the scenes is totally different.
We’re not saying that typing and sending aren’t part of the game, but a much more important aspect is to ensure that your email actually reaches its destination, and when it does, it is not flagged as spam or seen as suspicious.
To get your emails to reach the recipients’ inboxes, you must authenticate them. One of the first and most basic ways to authenticate your email is by using SPF, or Sender Policy Framework. This authentication protocol allows you to declare which mail servers are allowed to send emails on your behalf. You do this by adding an SPF record to your domain’s DNS settings. This record simply lists which servers or services are allowed to send email using your domain.
The SPF record is an important aspect of authentication, so you should know how to add it correctly to your DNS.
What is an SPF record and why do you even need it?
An SPF record (Sender Policy Framework record) is a type of DNS TXT record that helps protect your domain from email spoofing. When you add an SPF record to your domain, you’re clearly stating which mail servers are allowed to send emails on your behalf. This means if someone tries to send an email pretending to be you, but from an unauthorized server, it will be blocked.

Whenever you send an email, the receiving mail server checks your SPF record to verify its authenticity. It compares the IP address of the sending server to the list of approved servers in your record. If there’s a match, the email is let in. If not, it may be flagged as spam or rejected.
Without a valid SPF record, even real emails you send can be treated as suspicious. So, if your domain is used to send email, whether through Gmail, Outlook, marketing tools, or your own servers, setting up an SPF record is a key step to making sure your emails are both trusted and delivered properly.

How to add an SPF record in your DNS?
You’d be surprised to know that in a survey conducted for over 12 million domains, around 56.5% of them had SPF records, and 2.9% of those records had errors or undefined rules, which ultimately undermined their effectiveness.
Assuming that you don’t want to fall into the same category, we have created a step-by-step guide to help you add an SPF record to your DNS
Here’s how to do it:
Step 1: Identify all the sending IPs and services
Before you create your SPF record, make a list of every server or service that sends email on behalf of your domain. This list should include all the services or platforms you use, like Gmail (Google Workspace), Microsoft Outlook, Zoho Mail, CRMs, Mailchimp, HubSpot, etc.
Keep in mind that if you miss anything, emails from those services might get rejected or land in spam.

Step 2: Authorize these servers
Now that you’ve listed all the services that send email from your domain, the next step is to allow them in your SPF record. Use SPF mechanisms like ip4: for IPv4 addresses, ip6: for IPv6, a for your domain’s A record, and mx for your mail servers. For email platforms like Gmail or Mailchimp, use include: (e.g., include:_spf.google.com).
While you’re at it, make sure that you keep your record short and stay within SPF’s limit of 10 DNS lookups to avoid delivery issues.
Step 3: Create your SPF record
Now that you know which servers you want to allow, you can write your SPF record. Your record should start with v=spf1, followed by the mechanisms like ip4:, include:, or mx, and end with ~all or -all.
Take this as an example:
v=spf1 ip4:203.0.113.25 include:_spf.google.com ~allUse an SPF flattening tool to simplify long DNS lookups and ensure your SPF record stays within the 10-lookup limit.

Step 4: Add the record to your DNS settings
Log in to your domain provider’s account and open the DNS settings for your domain. There, you’ll find an option to add a new TXT record. In the name or host field, type @ if you want to apply it to your main domain, or use a subdomain if needed. Then, in the value field, paste your full SPF record. Save the changes. Just make sure you have only one SPF record; if you use more than one service, combine everything into a single line.
Step 5: Check if it’s working properly
You can’t just publish your SPF record and let it be. Make sure that you take time to verify it and check that everything is working properly. To do this, you can use any free SPF record checker available online.
If you still need help adding the SPF record to your DNS, v=spf1 ip4:203.0.113.25 include:_spf.google.com ~all! Book a demo with us today!


