How To Set Up SPF For Site5 DNS: A Step-By-Step Guide

Quick Answer
To set up SPF in Site5 DNS, log in to your Site5 DNS manager, add or update a single TXT record starting with v=spf1, include all authorized email senders, save the changes, and verify the record after DNS propagation to improve email security and deliverability.
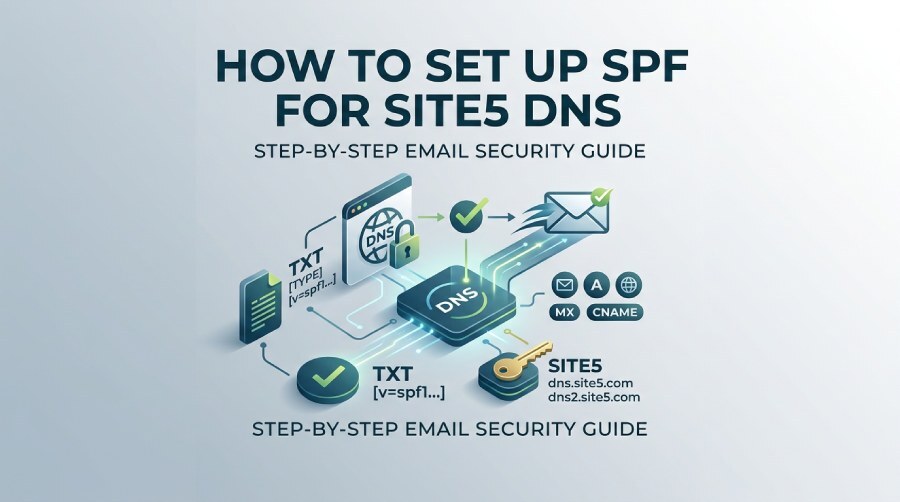
Creating an SPF record in Site5 DNS is crucial for safeguarding your domain against email spoofing and ensuring that your emails successfully land in recipients’ inboxes. Regardless of whether you utilize Site5 for web hosting or DNS management, properly setting up your SPF record permits authorized mail servers and enhances your overall email security. This comprehensive guide will lead you through the process of configuring SPF in Site5 DNS, highlight important factors to consider, and provide best practices for confirming your setup.
Step-by-Step SPF Setup for Site5 DNS
Understanding SPF Records and Why They Matter for Site5 DNS
SPF, or Sender Policy Framework, is an email authentication method that tells receiving mail servers which systems are allowed to send email for your domain. In practical terms, an SPF record is published as a TXT record in DNS, and it helps reduce spoofing, phishing, and failed email delivery. If your domain uses Site5 for DNS, the SPF TXT record must be added where your authoritative DNS records are managed.
For many Site5 customers, that means confirming whether the domain uses the Site5 nameservers: dns.site5.com and dns2.site5.com. If your domains nameservers are dns.site5.com and dns2.site5.com, your active DNS zone is likely inside Site5. However, if you use custom nameservers, external DNS, or third party DNS through a registrar such as Squarespace or another domain registration provider, you must edit the SPF record there instead.
SPF works alongside DKIM and DMARC. DKIM signs outgoing mail cryptographically, SPF verifies approved sending sources, and DMARC tells receiving servers what to do when SPF or DKIM checks fail. For best deliverability, especially with Site5 web hosting, email hosting, reseller hosting, VPS, Cloud VPS, Shared Cloud Hosting, or Reseller Cloud Hosting, all three should be configured correctly.

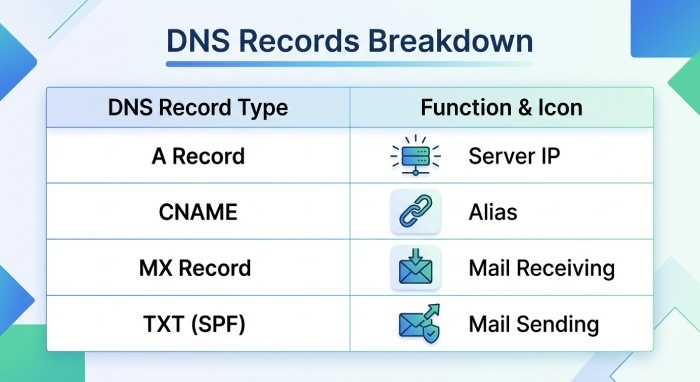
It is important to understand that SPF is not the same as an A record, CNAME record, or MX record. An A record points a hostname to an IP address. A CNAME record aliases one hostname to another. An MX record tells the internet which mail servers receive email for your domain. SPF, by contrast, authorizes outbound mail senders. Still, these host records often appear together in the same DNS zone, so you should review the A record, CNAME record, MX record, and TXT records before making changes.
Gathering the Required Email Sending Sources Before You Start
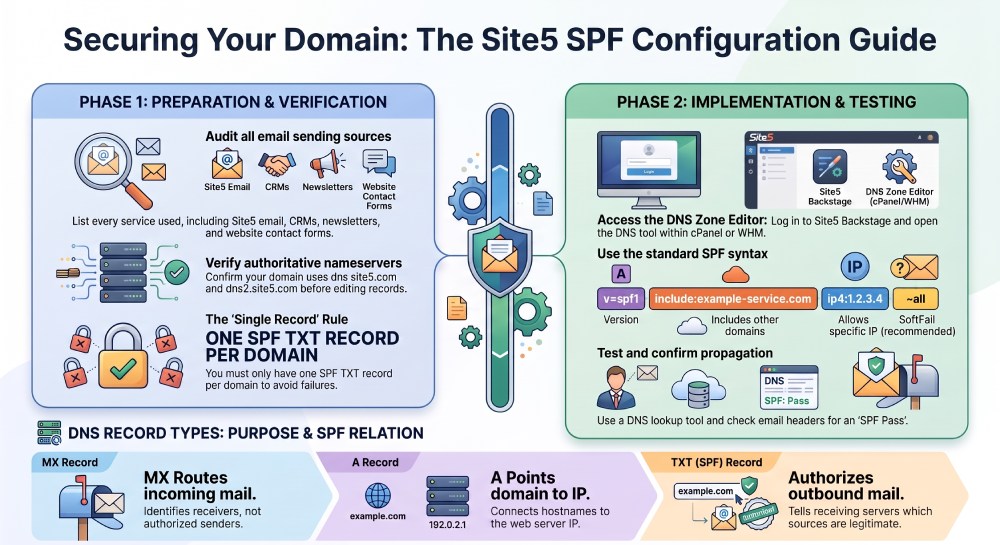
Before logging in to Site5, make a list of every service that sends mail for your domain. This may include Site5 email hosting, a website contact form, a CRM, a newsletter platform, Google Workspace, Microsoft 365, transactional email services, billing systems, or website builders. If your site uses PHP mail from a Site5 server, you may need the server IP or shared IP used by the hosting account. If your website runs on fully managed VPS or another VPS product, confirm the correct server ip before adding it to SPF.
A complete SPF plan starts with your domain info. Check where your domain names are registered, which registrar controls the domain registration, and whether the domain points to Site5 nameservers. If you recently performed a migration, move domain request, or update DNS change, verify whether the domain is using internal DNS at Site5, external DNS elsewhere, or third party DNS such as Squarespace.
If your domain uses dns.site5.com and dns2.site5.com, you will usually manage the SPF TXT record through Site5 control panels. If the account uses custom nameservers, especially in reseller hosting, the custom nameservers may still map back to Site5 DNS infrastructure. For example, branded custom nameservers may ultimately point to Site5 systems, while the visible nameservers are not exactly dns.site5.com and dns2.site5.com. In that case, use the authoritative DNS zone associated with those custom nameservers.
Also review other host records. Your MX record should identify the servers receiving mail. Your A record may point to your Site5 hosting IP address. Your CNAME record may route services such as www, tracking links, or verification hosts. Addon domains, parked domains, and subdomains may each have different DNS records, so do not assume one SPF record covers every domain unless they share the same root domain policy.
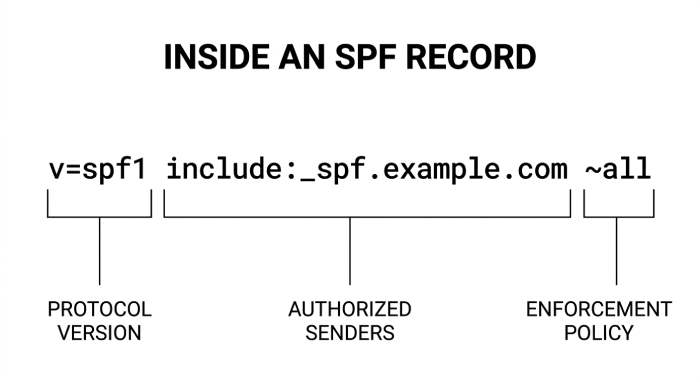
A typical SPF value may look like this:
v=spf1 include:example-mail-service.com ip4:203.0.113.10 ~allOnly publish one SPF TXT record per domain. Multiple SPF records can cause SPF validation failures. If your record grows past the 10-lookup limit, an SPF flattening tool can consolidate your includes.
Logging In to Site5 and Locating the DNS Zone Editor
To edit Site5 DNS, sign in through the Site5 client login or Backstage area. Depending on your account type, you may access DNS tools through cPanel, MultiAdmin, SiteAdmin, or WHM. Site5 has historically offered several control panels, so the exact path may vary. If you are unsure, the Site5 knowledge base and support team can help confirm whether your DNS is managed in cPanel, MultiAdmin, SiteAdmin, WHM, or another interface.
Once logged in, locate your domain and open the DNS Zone Editor, Advanced DNS Zone Editor, or equivalent host records section. You should see existing DNS records, including an A record for the root domain or web server, a CNAME record for aliases such as www, and an MX record for inbound mail. You may also see TXT records for DKIM, SPF, DMARC, domain verification, and application services.
If you do not see DNS controls, check whether the domains nameservers are actually set to dns.site5.com and dns2.site5.com. You can verify this with a WHOIS lookup or DNS checker. If the nameservers are not dns.site5.com and dns2.site5.com, Site5 may not be authoritative for the domain. In that case, log in to the registrar or third party DNS provider and edit the zone there.
For reseller hosting customers, WHM may expose DNS zones for multiple accounts. Custom nameservers are common in this setup, giving resellers the freedom to brand DNS under their own domain names. Even when using custom nameservers, you should still review the underlying Site5 DNS zone and confirm that the host records match the intended A record, CNAME record, MX record, and SPF TXT configuration.
Site5 accounts may also include tools unrelated to SPF, such as Fantastico, Softculous or Softaculous, Horde, RoundCube, SquirrelMail, RVSiteBuilder, RVSkin, MySQL, PHPMyAdmin, SQLite, Git, Mercurial, Perl, Python, and Ruby On Rails. These tools may send mail from scripts or applications, so include them in your sending-source audit if they generate notifications, password resets, or form submissions.
Creating or Updating Your SPF TXT Record in Site5 DNS
In the DNS zone editor, look for an existing TXT record that starts with:
v=spf1
If one exists, update it rather than creating a second SPF record. If none exists, create a new TXT record. The host/name field is usually @ for the root domain, though some Site5 interfaces may use the full domain name. The value field contains the SPF policy.
For a simple Site5-only setup, your SPF record may need to authorize Site5s mail servers. Our free SPF record generator can build a valid record for you to paste in. If you also send through another provider, add that providers include mechanism. For example:
v=spf1 include:mailprovider.example ip4:203.0.113.10 ~allUse ip4: only when you are certain of the correct ip address or server ip. If your account is on a shared ip, confirm with Site5 support before hard-coding the address. On VPS, fully managed VPS, or Cloud VPS plans, the server IP may be more predictable than on shared web hosting, but it should still be verified.
Do not confuse the SPF TXT record with an A record, CNAME record, or MX record. You may need to point a record, such as an A record, to the correct web server during a migration, but that does not authorize email sending. Likewise, an MX record controls where mail is received, not which servers are allowed to send it. A CNAME record can help verify third-party services, but it generally does not replace SPF. For advanced authorization patterns, see how Sender Policy Framework macros work.
When saving the record in Site5 DNS, check formatting carefully:
- Use only one SPF TXT record for the same hostname.
- Keep the record under DNS TXT length limits.
- Use include: for approved email platforms.
- Use ip4: or ip6: only for confirmed sending IPs.
- End with
~allfor a soft fail or-allfor a stricter fail.
After saving, allow for propagation time. DNS changes through Site5, custom nameservers, external DNS, or third party DNS may appear quickly, but full propagation can take several hours depending on TTL values and resolver caching.
Testing, Troubleshooting, and Maintaining Your SPF Record
After the propagation time has passed, test the SPF record with a DNS lookup tool. You can also confirm the result with our SPF record checker. Query the TXT records for your domain and confirm that exactly one SPF record appears. Also verify that your nameservers are correct. If the active nameservers are dns.site5.com and dns2.site5.com, the result should reflect the record you added in Site5. If the lookup shows different data, your domain may still be using external DNS, custom nameservers, or a registrar-managed zone.
Next, send test mail to providers such as Gmail, Outlook, or another mailbox and inspect the message headers. Look for SPF pass, DKIM pass, and DMARC alignment. If SPF fails, review whether the sending service is included in the policy. If mail is sent from a website form, confirm whether it originates from the Site5 server, a third-party SMTP service, or an application layer running under PHP, Python, Perl, Ruby On Rails, or another stack.
Common SPF issues include multiple SPF records, missing include mechanisms, incorrect host records, stale DNS records after a move domain or migration project, and mismatched DNS zones. It is also common to update DNS in Site5 while the domain is actually pointed at another providers nameservers. Always confirm whether dns.site5.com, dns2.site5.com, or custom nameservers are authoritative before editing.
Review related records as well. The A record should point to the correct website destination. The CNAME record for www or service aliases should resolve as expected. The MX record should point to the correct mail platform. For addon domains, parked domains, and subdomains, check whether separate SPF TXT records are needed. For example, example.com and mail.example.com may not share the same policy unless you publish records accordingly.
Maintain SPF whenever your sending environment changes. If you switch email hosting, add a CRM, migrate from Site5 shared hosting to VPS, adopt Reseller Hosting, or connect website builders such as Squarespace, revisit the SPF record. Keep DKIM and DMARC aligned with SPF so receiving systems can authenticate your domain reliably. If you are uncertain which Site5 DNS zone, control panels, or nameservers apply, use the Site5 knowledge base, Backstage tools, client login area, or support channels to confirm before making changes.
General Manager
General Manager of DuoCircle. Product strategy and commercial lead for AutoSPF's 2,000+ customer base.
LinkedIn Profile →