Mailgun SPF Setup: How To Configure SPF For Mailgun Emails

Quick Answer
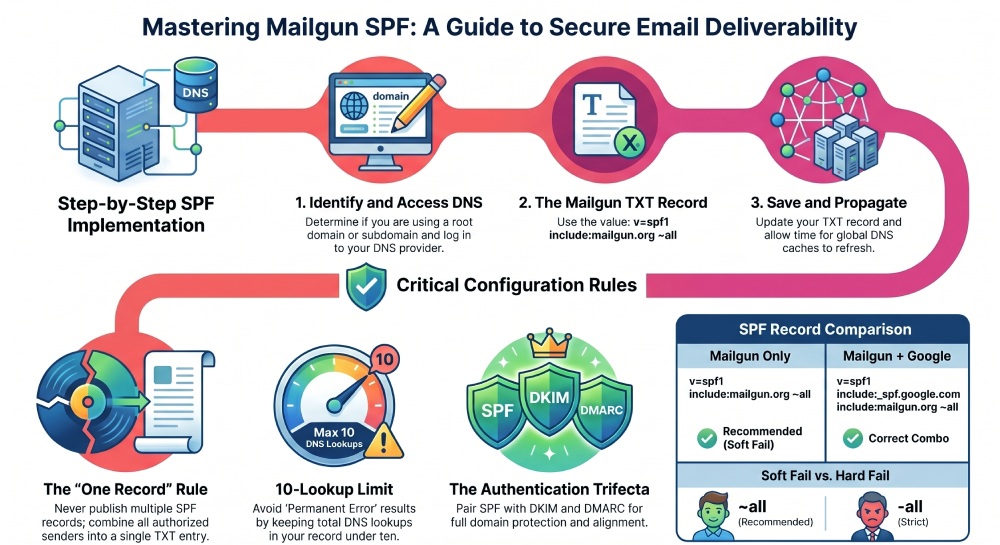
SPF setup for Mailgun involves adding a DNS TXT record to authorize Mailgun to send emails on your domain’s behalf. Typically, you include: v=spf1 include:mailgun.org ~all. This helps prevent spoofing and improves email deliverability by validating Mailgun as a trusted sender.
SPF, or Sender Policy Framework, is an email authentication mechanism that tells receiving inbox providers which mail server is authorized to send email for a specific sender domain. When you send messages through Mailgun, the receiving system performs an SPF check by looking up the domain’s SPF record in DNS and comparing the sending IP address against the sources allowed by that SPF policy.
The SPF protocol helps prevent message spoofing, email spoofing, and unauthorized use of your domain. Without a valid SPF record, a spam filter may treat Mailgun messages as suspicious, especially if the email sender reputation of the sending domain or IP address is still developing. This can hurt email deliverability, increase bounce rates, and contribute to spam complaints.
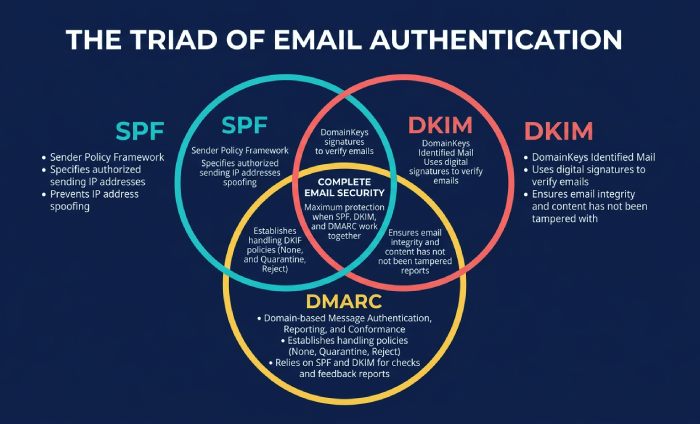
For Mailgun, SPF is only one part of a complete email authentication configuration. You should also configure DKIM and DMARC. SPF validates whether a sending mail server is authorized. DKIM uses cryptographic signing with a public key in DNS and a private key controlled by the email sending service. DMARC then evaluates SPF alignment and DKIM alignment against the visible From domain and provides email policy enforcement, aggregated reporting, and forensic reporting.
In practice, trusted email delivery depends on all three: SPF, DKIM, and DMARC. A clean SPF pass is useful, but if SPF alignment fails under DMARC, the message may still be treated as unauthenticated. That is why domain authentication in Mailgun should include the SPF record, DKIM TXT record, and a DMARC DNS record for the sender domain or dedicated subdomain.
Mailgun SPF Requirements: The Correct DNS TXT Record to Add
For most Mailgun senders, the required SPF record is published as a DNS TXT record on the sending domain or subdomain:
v=spf1 include:mailgun.org ~all
This TXT record contains the SPF version, v=spf1, followed by the SPF include mechanism, include:mailgun.org. The include:mailgun.org value authorizes Mailgun’s mail server infrastructure to send on behalf of your sender domain. The final mechanism, ~all, is a soft fail. A soft fail tells receiving mail servers that sources not listed in the SPF record are probably unauthorized, but the message should not necessarily be rejected outright.
Some organizations prefer -all, which represents a hard fail. A hard fail is stricter and tells receiving systems that any unauthorized mail server should fail SPF. However, before using hard fail, confirm that every legitimate email sending service is included, such as Mailgun, your CRM system, customer support platform, marketing platform, or another marketing tool. A rushed SPF modification can accidentally cause SPF fail results for a valid business email.
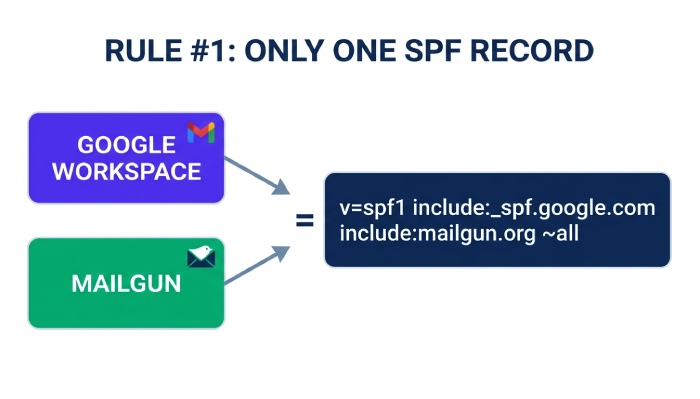
A domain must have only one SPF record. You should not publish multiple SPF TXT record values, such as one for Google Workspace and another for Mailgun. Instead, combine them into a single TXT record:
v=spf1 include:_spf.google.com include:mailgun.org ~all
For example, if example.com sends corporate email through Google and transactional email through Mailgun, the sender domain should have one combined SPF record. Multiple SPF records commonly cause SPF authentication errors because receiving mail servers do not know which DNS record represents the active SPF policy.
Step-by-Step Guide to Adding Mailgun SPF to Your Domain DNS
- Identify the correct sender domain: In Mailgun, review the domain authentication or domain validation screen in the Help Center workflow. Confirm whether you are authenticating the root domain, such as example.com, or a dedicated subdomain, such as mg.example.com. A dedicated subdomain is often recommended for transactional email because it improves subdomain management and separates Mailgun activity from corporate email.
- Open your DNS provider: Log in to your DNS provider, such as Cloudflare, GoDaddy, Namecheap, DigitalOcean, or the DNS host that took over records from Google Domains. The interface varies, but you are looking for the DNS zone where you can add or edit a TXT record.
- Add or modify the SPF TXT record: If no SPF record exists, create a new TXT record. Use the host/name field for the sender domain. For a root domain, the host may be @. For a subdomain such as mg.example.com, the host may be mg. The value should include
include:mailgun.org:v=spf1 include:mailgun.org ~allIf an SPF record already exists, use modifying SPF record practices rather than creating a second DNS record. For example, add the Mailgun SPF include to the existing policy:v=spf1 include:_spf.google.com include:mailgun.org ~all - Save the DNS record and wait for propagation: DNS updates are not always instant. Your DNS provider may publish the TXT record quickly, but global resolvers can take minutes or hours depending on TTL settings. During this window, Mailgun domain validation may still show the SPF setup as incomplete.
Example: Adding the Mailgun TXT Record in Common DNS Providers
In Cloudflare, create a TXT record and set the name to @ or your Mailgun subdomain. In GoDaddy and Namecheap, use the host field similarly. In DigitalOcean DNS, add a TXT record in the domain zone and paste the SPF record as the value. If your DNS provider automatically quotes TXT values, do not add extra quotation marks unless required by the interface.
How to Verify Your Mailgun SPF Setup and Troubleshoot Common Errors
After publishing the TXT record, verify the SPF setup in Mailgun and with an external online tool. Mailgun’s domain authentication page checks whether the SPF record exists and whether it contains include:mailgun.org. You can also use MxToolbox SuperTool, dmarcian, DKIMcore, or another DNS lookup tool to inspect the DNS record.
A successful SPF check should show an SPF pass when Mailgun is the sending mail server. If you see SPF fail, check for these common issues:
- Multiple SPF records: A domain should publish one SPF record only. Merge all senders into a single TXT record.
- Missing include: Ensure the value contains
include:mailgun.orgexactly, notinclude:mailgun.comor another variation. - Wrong host: The SPF record must be on the actual sender domain used in the Mailgun message envelope.
- DNS propagation delay: Wait for DNS caches to update, then test again.
- Overly strict policy: A hard fail may reject valid mail if the SPF policy is incomplete.
Also, confirm that the domain has DKIM configured. Mailgun typically provides a DKIM TXT record using a selector. DKIM relies on an RSA key pair: the public key is published in DNS, while the private key is used by the signing system. If you manage keys outside Mailgun, tools such as OpenSSL can generate RSA material, and secrets can be stored in AWS Secrets Manager or HashiCorp Vault. Plan key rotation carefully so DKIM signatures do not break.
SPF Best Practices for Mailgun: Avoiding Lookup Limits, Misalignment, and Authentication Failures
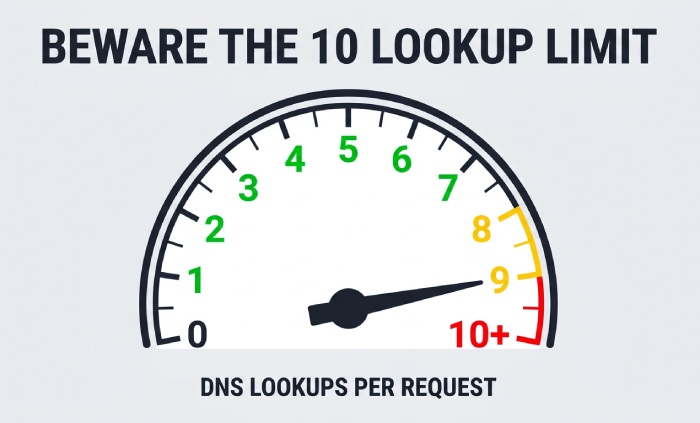
The SPF protocol has a DNS lookup limit of 10. Every include, a, mx, exists, or redirect mechanism can trigger additional DNS lookups. If your SPF record includes Google, Mailgun, a CRM system, a marketing platform, and a customer support tool, you may hit the DNS lookup limit. When that happens, SPF may return a permanent error, which can damage email deliverability. AutoSPF streamlines the management of SPF records by automating their flattening and avoiding DNS lookup limit problems in Mailgun and various other email platforms.
Avoid unnecessary includes. Keep your SPF policy clean and document every email sending service. SPF flattening can reduce lookups by replacing includes with IP address ranges, but it must be maintained carefully because providers such as Mailgun can change infrastructure. Poor SPF flattening can lead to a blocklisted IP address or an outdated authorized sender list remaining in your DNS record.
For organizations managing SPF for multiple domains, use a consistent authentication configuration process. Each sender domain or dedicated subdomain should have its own DNS record, SPF record, DKIM record, and DMARC record where appropriate. Do not assume that authenticating example.com automatically authenticates mg.example.com.
Managing Multiple Domains, Subdomains, and Authentication Alignment
SPF alignment matters for DMARC. SPF alignment means the domain that passes SPF must align with the visible From domain according to DMARC rules. If Mailgun sends using a bounce or return-path domain that does not align with the sender domain, SPF may pass technically, but DMARC may still fail unless DKIM alignment passes.
This is why DKIM is especially important with Mailgun. A properly signed DKIM message can preserve DMARC alignment even when SPF alignment is not perfect. For best results, configure Mailgun’s tracking, bounce, and sending settings so the sender identity verification process is consistent across the domain.
DKIM, DMARC, and Reporting Controls to Pair with SPF
Once SPF is working, add DMARC for policy visibility and enforcement. A basic DMARC TXT record might begin with:
v=DMARC1; p=none; rua=mailto:dmarc-reports@example.com
Start with p=none to collect aggregated reporting before moving to quarantine or reject. DMARC reports can reveal unauthorized mail server activity, phishing prevention gaps, email spoofing attempts, and sources causing SPF fail or DKIM fail results. Tools like dmarcian can help interpret these reports and improve your state of email deliverability report over time.
Pairing SPF, DKIM, and DMARC gives Mailgun messages a stronger authentication foundation. With the correct SPF record, a valid DKIM selector, and a monitored DMARC policy, your Mailgun sender domain is better positioned for trusted email delivery and long-term inbox placement.
General Manager
Founder and General Manager of DuoCircle. Product strategy and commercial lead for AutoSPF's 2,000+ customer base.
LinkedIn Profile →