The Ultimate AutoSPF Guide To Zendesk SPF & DKIM Configuration

Quick Answer
In today’s email‑centric world, ensuring that your support and outbound emails are trusted by inbox providers like Gmail, Outlook, Yahoo, and others is critical - not just desirable. Without proper email authentication, your messages can easily land in spam folders or be blocked outright.
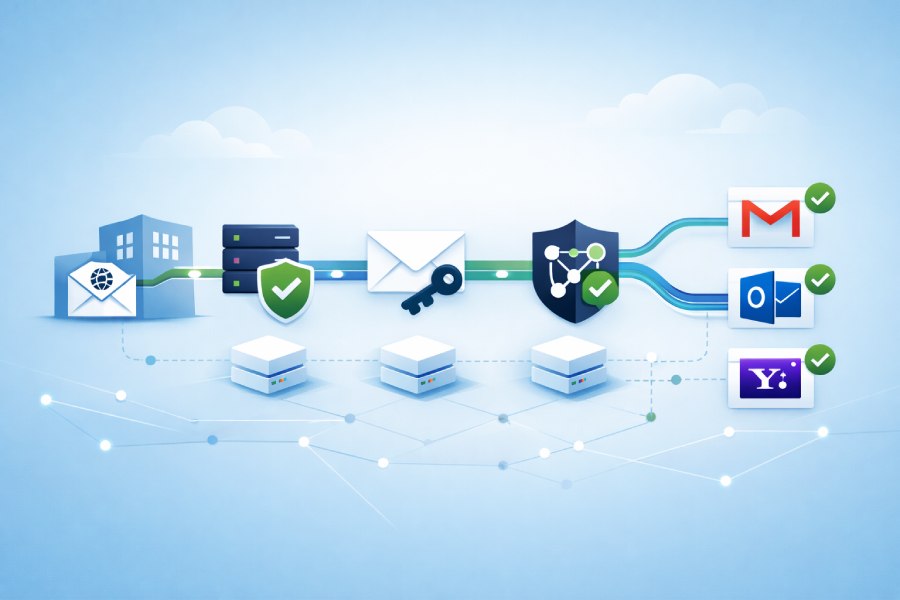
In today’s email‑centric world, ensuring that your support and outbound emails are trusted by inbox providers like Gmail, Outlook, Yahoo, and others is critical - not just desirable. Without proper email authentication, your messages can easily land in spam folders or be blocked outright. This is especially true for customer support platforms such as Zendesk, which send transactional and notification emails on your behalf.
DKIM (RFC 6376) signs email messages cryptographically, and unlike SPF, the signature survives email forwarding - which is why DMARC alignment via DKIM is more reliable than SPF alignment for forwarded mail and mailing lists.
At AutoSPF, we’re committed to making email authentication simple, effective, and transparent. In this guide, we’ll walk you through exactly how to configure SPF (Sender Policy Framework) and DKIM (DomainKeys Identified Mail) for Zendesk so that your emails are properly authenticated and aligned with DMARC. By the end, you’ll understand not only how to set these records up - but why each step matters.
Why SPF and DKIM Matter for Zendesk Emails
Before we dive into the configuration steps, let’s briefly explain what these protocols do - in plain language:
🛡️ SPF, Sender Policy Framework
SPF tells receiving email servers which servers are allowed to send email on behalf of your domain. If a server isn’t on that list, the email can be marked as suspicious or rejected.
🖋️ DKIM, DomainKeys Identified Mail
DKIM adds a cryptographic signature to each outgoing email. This means that receivers can check whether the email was truly sent by an authorized sender and whether it was altered in transit.
🚦 DMARC, Domain-based Message Authentication, Reporting & Conformance
DMARC ties SPF and DKIM together, specifying how email receivers should handle emails that fail authentication. While this guide focuses on SPF and DKIM, proper DMARC implementation depends on having both set up correctly.
Part 1 - Setting Up SPF for Zendesk
🧱 What Does Zendesk Need from SPF?
Zendesk sends support emails on your behalf, but it’s not your mail server. That means you must tell the world’s email systems:
Yes, Zendesk is authorized to send emails for our domain.
To do that, you add Zendesk’s mail servers to your SPF record via an “include” mechanism.

📌 Step‑by‑Step: Create or Update Your SPF Record
1. Locate Your DNS Provider
Log in to the service where your domain’s DNS is managed - e.g., Cloudflare, GoDaddy, AWS Route 53, Namecheap, etc.
SPF records live in DNS as a TXT record.
2. Check if You Already Have an SPF Record
You may already have a TXT record that begins with v=spf1. If you do, you must edit that record rather than create a new one. Only one SPF TXT record is allowed per domain.
Partial Multiple SPF records = permanent SPF error (PermError).
3. Add Zendesk to Your SPF Record
Add the following mechanism inside your SPF record:
include:mail.zendesk.com
Your SPF record might end up looking like:
v=spf1 include:mail.zendesk.com include:other‑services.com ~all
The ~all (soft fail) at the end tells receivers to accept but flag emails that don’t match your SPF. You can adjust this based on your DMARC policy, but it’s common during setup.
4. Save and Publish the SPF Record
After editing the TXT record, save it. DNS propagation may take from a few minutes to up to 48 hours, depending on your DNS provider.
5. Go to Zendesk Admin Console
Once your DNS change has propagated:
-
Open Zendesk → Admin → Channels → Email
-
Hover over Add Address → Connect External Address
-
Provide your support email or connect with Google Workspace/Office 365 forwarding
-
Ensure automatic forwarding is enabled for your support address
Zendesk will then verify whether your SPF is correctly detected.
Part 2 - Setting Up DKIM for Zendesk
While SPF verifies where your emails come from, *DKIM verifies that the message belongs to you and has not been tampered with. Correct DKIM setup is incredibly powerful for inbox deliverability.

📌 Step‑by‑Step: Create DKIM Records
1. Open Your DNS Management Console
You’ll create two new CNAME records in your DNS zone.
2. Create Record #1
-
Type: CNAME
-
Name/Host:
zendesk1._domainkey.yourdomain.com
- Target/Value:
zendesk1._domainkey.zendesk.com
3. Create Record #2
-
Type: CNAME
-
Name/Host:
zendesk2._domainkey.yourdomain.com
- Target/Value:
zendesk2._domainkey.zendesk.com
These dual records exist because Zendesk rotates DKIM keys for improved security.
4. Enable DKIM Signing in Zendesk
After publishing your CNAME records:
-
Go to Zendesk Admin → Channels → Email
-
Locate the Custom domain for DKIM section
-
Click Enable, then Save
If everything is correct, Zendesk will begin signing outgoing emails with your DKIM key.
How to Verify That Everything Works
✔️ Check SPF
You can use tools like:
-
AutoSPF’s SPF checker
-
DNS record lookup tools
-
Online SPF validators
You should see your domain’s SPF record, including mail.zendesk.com.
✔️ Check DKIM
Use DKIM validation tools and enter:
| Selector | Domain |
|---|---|
| zendesk1 | yourdomain.com |
| zendesk2 | yourdomain.com |
If you see a green success or “valid signature,” the DKIM records are correct.
What Are Common Setup Issues & Troubleshooting?
Even with all records in place, problems sometimes occur:
Partial Emails Still Going to Spam
If your support emails still land in spam - even after SPF and DKIM are set - consider:
-
Inspecting your forwarding setup (especially if using Office 365 or Gmail)
-
Confirming that forwarding servers preserve DKIM signatures
-
Checking your DMARC policy - a strict p=reject with misaligned SPF/DKIM may still cause problems
Community users have reported that just enabling DKIM without verifying forwarding and alignment can still cause delivery issues.
What Are Best Practices for Beyond SPF & DKIM?
📩 1. Publish a DMARC Record
Once your SPF and DKIM are reliably passing, publish a DMARC record to specify how mail receivers should react to failures.
Example basic DMARC:
v=DMARC1; p=quarantine; rua=mailto:dmarc‑reports@yourdomain.com; pct=100
📊 2. Monitor Daily
Use report aggregation tools to understand:
-
How many emails pass/fail SPF/DKIM
-
Which IPs/services are sending
-
Whether someone is spoofing your domain
🔄 3. Stay Updated
DNS changes can take time, and ISP rules evolve. Periodically verify:
-
Your SPF record doesn’t exceed DNS lookup limits
-
DKIM selectors haven’t rotated
-
Your domain has up‑to‑date records
Final Takeaway
Properly configuring SPF and DKIM for Zendesk is one of the most impactful steps you can take to ensure reliable email delivery and protect your brand reputation. While the process involves DNS changes, the benefits extend across security, deliverability, and trustworthiness. At AutoSPF, our goal is to empower you with the right tools and guidance to move beyond guesswork - so you can send with confidence.
Topics
Content Specialist
Content Specialist at AutoSPF. Writes vendor-specific SPF configuration guides and troubleshooting walkthroughs.
LinkedIn Profile →