Setting up an SPF record can feel like navigating a maze, especially for those not deeply familiar with the world of email security. Imagine sending out an email that looks perfectly legit, only for it to land in someone’s spam folder because your domain’s protection wasn’t set up right—that’s frustrating! But don’t worry; this guide is here to simplify everything for you.
We’ll break down what an SPF record is, why it matters, and how to configure it specifically for Zix, so you can ensure your communications are not only delivered but trusted by recipients. Understanding and implementing these records can significantly enhance your email security while keeping your brand’s reputation intact. Let’s dive into the nuts and bolts to get your emails sailing smoothly!
To set up an SPF record for Zix, you need to include specific entries in your DNS settings that authorize Zix to send emails on your behalf. It is crucial to refer to the documentation related to the particular Zix product you are using for precise configuration instructions, and consider reaching out to Zix support for tailored assistance if needed.
What is a Zix SPF Record?
A Zix SPF (Sender Policy Framework) record functions as a protective shield for your email communications. It’s not just a random line of text but a strategic DNS entry crafted to determine which mail servers have permission to send emails on behalf of your domain. Essentially, its primary role is to safeguard against email spoofing—a technique used by cybercriminals to impersonate legitimate organizations. By implementing a proper SPF record, you’re helping ensure that the emails sent from your domain are recognized as authentic, greatly reducing the likelihood of them being flagged as spam or potentially harmful.
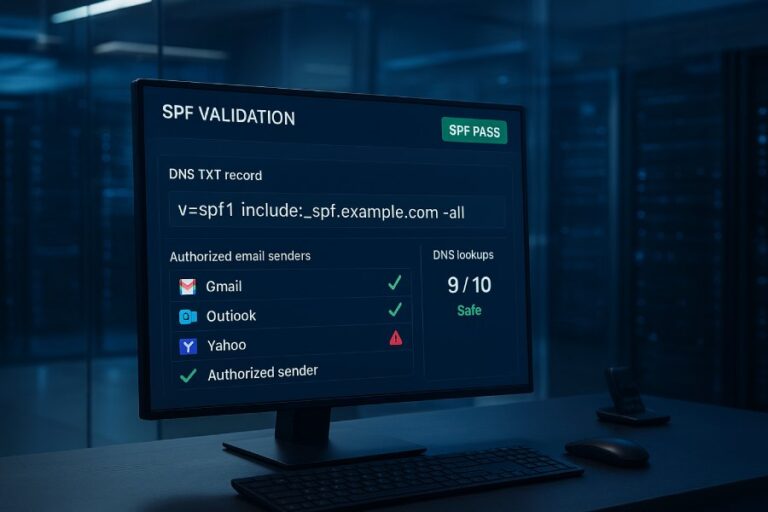
Let’s examine the key components of an SPF record to have a clearer understanding of its structure and functionality. The SPF record typically appears as:
v=spf1 include:spf.protection.zixcorp.com ~allThis looks technical, but it breaks down neatly. The initial segment, v=spf1, specifies the version of the SPF protocol you’re using. This is crucial since different versions can dictate how various systems interpret your SPF rules.
The next important piece is include:spf.protection.zixcorp.com, which designates Zix as an authorized sender for your domain’s email communications. It’s this inclusion that creates trust in your outgoing messages; without it, emails sent through Zix might fail to authenticate properly.
Finally, the ~all directive serves as a safety net for any sending servers not expressly included in the previous clauses. This means that while emails from unauthorized servers won’t necessarily be outright rejected (a “soft fail” instead), this component still indicates a warning that other servers should ignore them.

Moreover, configuring these records accurately requires an understanding of each element’s implications and regular updates based on changes in your email services. So let’s explore how these records function in practice and the impact they have on email deliverability.
How SPF Records Work
SPF operates by utilizing a simple yet effective mechanism that verifies the sender’s IP address against an authorized list specified within the DNS entry. When an email is sent, it reaches the recipient’s mail server, which promptly checks the sender’s domain to see if the sending server’s IP address is included in the associated SPF record. This functionality acts like a bouncer at a club, filtering out those who don’t belong. If the IP address matches one of those listed, the email is considered legitimate; however, if it doesn’t match, it may be marked as spam or outright rejected, significantly reducing the chances of successful spoofing attempts.
The underlying principle of SPF not only aids in credential verification but also enhances email security by presenting a barrier against malicious activities like phishing scams. The effectiveness of this protocol lies in its collaborative structure—domains work together to establish trust through their records. For instance, if your domain specifies that it authorizes Zix’s servers to send emails on its behalf, any message transmitted by Zix will automatically pass the SPF validation process as long as it originates from one of those approved IP addresses.
In essence, this allows recipients to have a higher confidence level regarding the authenticity of messages they receive.
Example of SPF in Action
Consider a scenario: You operate a business using Zix for secure email sharing with clients and partners. If your domain’s SPF record includes Zix’s IP addresses, every email sent through Zix seamlessly passes the verification process, assuring recipients that the emails are coming from a trusted source.
On the flip side, imagine an unscrupulous actor attempts to send an email purporting to be from your domain but uses an unauthorized IP address. Because this fraudulent email does not align with your established SPF record, it will fail the check initiated by the recipient’s mail server. As a result, the intended recipient either never sees this email or discovers it in their spam folder—a substantial win for your brand’s integrity.
Properly configuring and maintaining your SPF records can dramatically reduce liabilities related to email security threats while bolstering your reputation in professional communications. By taking these proactive measures today, you empower yourself and protect others from potential fraud down the road. Keeping all necessary entries updated ensures you don’t inadvertently block legitimate communications and further secures your digital footprint within professional circles.
As we explore further into enhancing email safety and legitimacy, it’s crucial to consider the measures required to stay ahead of deceptive practices commonly employed by cybercriminals.
Protecting Against Spoofing
In the realm of email security, understanding spoofing is vital. Cybercriminals employ this tactic to send emails that appear to be from a legitimate domain, often with deceitful intentions—usually to steal sensitive information or initiate a financial scam. This makes it essential for businesses to shield themselves from these risks, and that’s where SPF records come into play.

Imagine your email domain as a prestigious clubhouse. You only want members who belong inside—and with an SPF record, you create a list of authorized senders who are permitted entry. Anyone trying to impersonate your domain without authorization gets stopped at the door. By clearly defining which mail servers have the right to send on your behalf, you reduce the risk of unwanted guests infiltrating your inbox through impersonation.
Why It Matters
Why should you care? Consider this: over 90% of cyberattacks begin with an email-based threat. This statistic emphasizes just how crucial it is to adopt protective measures like SPF records. Implementing an SPF record isn’t simply a best practice; it has become a necessary line of defense for any business serious about maintaining its reputation and protecting its data.
Think about the consequences of falling victim to a spoofing attack. It could lead not only to financial losses but also damage your company’s credibility as clients and partners lose trust in your ability to protect sensitive information. Additionally, without proper SPF configurations, legitimate emails might end up in spam folders due to lack of verification, hampering communication and productivity.
As we move forward, it’s important to recognize that simply setting up an SPF record isn’t sufficient—ongoing monitoring and updates are crucial to adapt to ever-evolving threats. Let’s turn our attention now to actionable steps that will guide you through configuring these essential protections effectively.
Step-by-Step Configuration Guide
Configuring your Zix SPF record may seem daunting at first, but it’s a straightforward process that yields substantial benefits for email security. The importance of this task cannot be overstated, as it helps prevent unauthorized senders from spoofing your domain. In this guide, we’ll explore each step to ensure clarity and confidence in your setup.

Step I – Identify Your Domain’s DNS Host
Begin by identifying your domain’s DNS host. Log into your domain registrar or DNS hosting provider—this might be GoDaddy, Cloudflare, or another service where you manage your domain settings. Think of this step as finding the right toolbox before you start a home improvement project; every detail counts when ensuring everything aligns perfectly.
Once you’re logged in, the next task is to locate the DNS settings specific to your domain.
Step II – Add or Modify the SPF Record
With the DNS settings open, you’ll either add a new SPF record or modify an existing one. If you’re creating a new TXT record, input the following value:
v=spf1 include:spf.protection.zixcorp.com ~allThis line indicates that Zix is authorized to send emails on behalf of your domain.
It’s crucial to note that if there is an existing SPF record, you should not replace it but rather expand it. Add include:spf.protection.zixcorp.com within the existing entry. This ensures that all other authorized sending services remain intact while including Zix’s servers as an additional layer of security.

After you’ve made these changes, saving and propagating them is essential.
Step III – Save and Test
Saving your changes isn’t the final step; it’s just the beginning of ensuring everything works as intended. Once you save the updated SPF record, it can take up to 48 hours for these changes to propagate across DNS servers globally. This waiting period is crucial because if you check too early, you might not see the updates reflected yet.
To verify your SPF record was set up correctly, utilize tools such as MXToolbox. Enter your domain name and check whether the SPF record appears as expected. Think of this final verification like checking the stability of a newly built shelf before loading it with books—you want to ensure it’s built strong enough to hold what’s placed upon it.
By meticulously following these steps, you’ll significantly bolster your email security and mitigate risks associated with phishing attempts that leverage spoofed emails. As you prepare for implementation, let’s consider some common hurdles you might encounter along the way.
Troubleshooting Common Issues
Even the most meticulous planning can encounter bumps along the road, and setting up your SPF records is no exception. One of the most common pitfalls is inadvertently creating multiple SPF records for a single domain. This confuses mail servers and leads to failures in email delivery. Therefore, it’s essential to ensure there is only one SPF record per domain. Your record should comprehensively include all necessary IP addresses and services that are authorized to send emails on your behalf. A well-structured single record not only helps prevent conflicts but also streamlines your email deliverability.
If you find yourself with multiple SPF records, it’s crucial to consolidate them into one cohesive document. During this process, check diligently that you have captured every required IP address and service provider. Each needed IP should be included in a single record string, allowing mail servers to clearly understand who is authorized to send emails for your domain without confusion.
To illustrate, think about it like a guest list for a party; if invitations go out with conflicting information about who’s allowed through the door, there will likely be chaos at the entrance.
After ensuring there is just one SPF record, the next step is to verify its accuracy. Here are some handy troubleshooting steps you can follow:
- Use online tools: Websites such as MXToolbox offer free SPF checking services that help you verify your configurations quickly. They scan for potential issues in your records and provide instant feedback.
- Look for syntax errors: Even small mistakes can lead to failures; check for missing colons or spaces in your record. Errors in formatting can compromise the record’s integrity.
- Confirm authorized IP addresses: Make sure all legitimate senders’ IP addresses are correctly listed and associated with your account. If you’ve recently added a new provider but haven’t updated your SPF record, that could lead to delivery problems.

By carefully following these steps, you’re well on your way to ensuring the reliability of email communication through proper configuration. As we continue, let’s examine how these configurations directly enhance security and efficiency when it comes to managing emails.
Benefits of Zix SPF Records
One of the most significant advantages is enhanced email security. By clearly specifying which mail servers are authorized to send emails on behalf of your domain, you effectively create a barrier against email spoofing and phishing attacks. This not only protects sensitive information but also helps maintain your organization’s credibility.
Imagine receiving an email that appears to come from your bank but is actually a cleverly disguised phishing attempt; it’s alarming. Implementing Zix SPF records significantly cuts down on this risk, safeguarding both your organization and its members.
As you adopt this measure, ensure that all legitimate servers and services used by your business are included in the SPF record. If you have a multi-faceted IT environment, such as third-party email services for newsletters or automated alerts, documenting these accurately becomes crucial. When everyone is aware of what is legitimate, the chances of malicious attacks diminish substantially.

Another vital benefit lies in improved deliverability. By having a correctly configured SPF record in place, emails sent from your domain are much less likely to end up languishing in spam or junk folders. This means that important communications—like contract negotiations or urgent requests—reach their intended audience right away. Just think about it: how many important messages have you missed because they landed in spam? With Zix SPF records, this happens less often, leading to higher open and response rates.
Companies across various sectors have reported significant improvements after integrating Zix SPF records into their systems. For instance, by ensuring their emails passed muster through targeted SPF configurations, one financial firm saw their email engagement rates increase by nearly 30%. That’s not just numbers; it translates to stronger client relationships and enhanced transaction speed.
But the benefits don’t stop there. Utilizing SPF records leads to streamlined communication overall. When employees know their emails will consistently be delivered without issues, they can focus more on content rather than potential problems like retracing steps if previous notes failed to reach colleagues. This newfound confidence instills greater productivity, allowing your team to shift its energy from managing technical concerns toward achieving strategic goals.
The operational efficiency seen through Zix SPF records complements the robust security framework already established. Together, they lay down a solid foundation that fortifies businesses against the relentless tide of email threats while optimizing communication strategies.
As we consider further methods to bolster email security and reliability, it’s essential to explore additional authentication techniques that enhance these efforts.
Alternative Email Authentication Methods
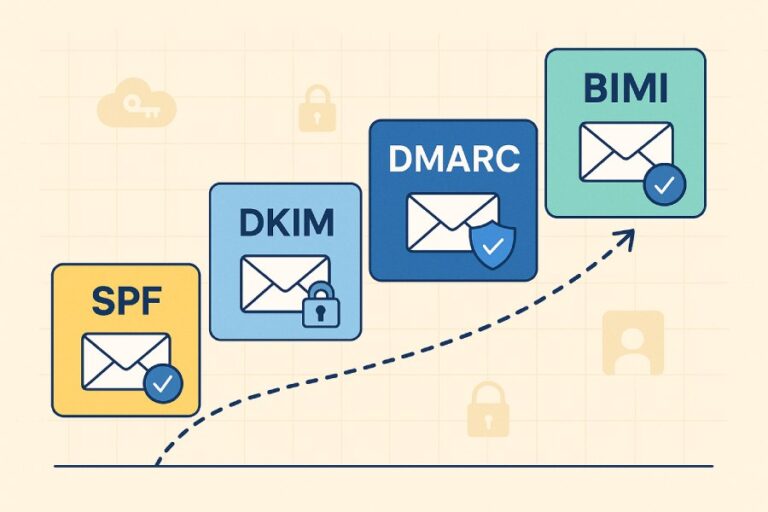
One of the most effective strategies for enhancing email security involves implementing two additional methods: DomainKeys Identified Mail (DKIM) and Domain-based Message Authentication, Reporting & Conformance (DMARC). Both methods work in tandem with SPF to create a robust multi-layered defense against the ever-present threats of email spoofing and phishing attacks.
DKIM and DMARC
To start with DKIM, this method adds a unique digital signature to your outgoing emails. Think of it as a verifiable mark or seal from your domain that assures recipients your message hasn’t been tampered with in transit.
When an email sent from your domain reaches its destination, the recipient’s server checks the attached DKIM signature against a public key published in your domain’s DNS record. If they match, it verifies you are indeed the sender. This not only bolsters your credibility but also significantly reduces the risk of falling victim to impersonation fraud.

Now you might ask, what about DMARC? Well, DMARC complements both SPF and DKIM. It allows senders to specify how recipient servers should handle emails that fail authentication checks—be it quarantining them or rejecting them outright.
By effectively combining these three methods—SPF, DKIM, and DMARC—you’re building a wall around your communications that is hard for attackers to breach.
Consider this complete setup akin to locking multiple doors in your house; by utilizing each lock wisely, you can prevent unwanted access. In fact, according to recent statistics, organizations that implement all three protocols notice a dramatic drop—often over 70%—in email fraud attempts targeting their domains. That’s why investing time into configuring DKIM and DMARC alongside SPF is worthwhile.
Moreover, setting up DMARC provides valuable feedback through reports about who is sending emails on behalf of your domain and how often those messages pass or fail authentication checks. These insights give you visibility into potential vulnerabilities within your email ecosystem and allow for timely adjustments.
While SPF lays the foundation for your email authentication strategy, integrating DKIM and DMARC forms a powerful triad of protection that significantly enhances security against malicious activities.
With these measures in place, organizations can foster a more secure email environment that protects both their data and their reputation. By understanding and implementing these methods, you’ll be well-equipped to deter unauthorized access and maintain trustworthiness in your communications.


