Intermediate 7 min read
Step-By-Step Mailchimp DMAR Setup With SPF And DKIM Configuration

Share
- DMARC, SPF, and DKIM work together to prove sender authentication for your Mailchimp messages. This trio of protocols forms the core of email domain authentication and domain authentication, letting inbox providers verify that you are an authorized sender for your custom domain.
- DKIM uses a cryptographic domain key to sign each message; the receiving mail server validates that signature via a DNS record. SPF lists the servers allowed to send on behalf of your domain using a TXT record. DMARC ties SPF and DKIM together and enforces alignment so that your campaign from field and the authenticated domain match what recipients see.
- Strong email domain authentication improves email delivery and overall deliverability, reduces email bounces, and strengthens reputation, spam prevention, and phishing protection across Gmail, Yahoo, and other mailbox providers.
Why Mailchimp users must care now
- Gmail and Yahoo increasingly reward authenticated mail with better placement, while unauthenticated mail is more likely to be filtered. For Mailchimp Transactional users sending time‑sensitive transactional email (password resets, receipts), proper sender authentication is essential to avoid delays.
- Mailchimp supports both automatic authentication checks and manual authentication steps. Tools like Entri can perform automatic authentication audits across DMARC, DKIM, and SPF to highlight risks before you send an email campaign to external recipients.
Step 1: Add and verify your sending domain in Mailchimp (Authenticated Domains)
Add your domain and verify domain ownership
- In Mailchimp, go to Domains > Authenticated Domains to authenticate your domain. Click Add to start email domain verification. You can verify domain ownership by receiving a code at an email address on the domain or by following Mailchimp’s authentication instructions.
- After you verify domain, Mailchimp will label it as an authenticated domain once the CNAME record checks pass. You’ll see validated records and an authentication status indicator in the interface.
Automatic authentication vs. manual authentication
- Mailchimp runs automatic authentication checks periodically, but you may still need manual authentication steps in your DNS. If the UI shows issues, use the “resolve authentication” or “restart authentication” options to re-check.
- If you need to pause changes, you can temporarily disable authentication checks in your workflow (you do not remove DNS records). If problems persist, consult authentication troubleshooting guides or contact your DNS provider’s support team.
Step 2: Configure DKIM in Mailchimp by adding the provided CNAME records
Retrieve DKIM details and map to DNS fields
- In the same Authenticated Domains area, Mailchimp provides DKIM CNAMEs (often labeled CNAME 1 and CNAME 2). Copy each host value and value field exactly.
- Each CNAME record publishes your DKIM domain key in DNS. Receivers will use this key to validate the cryptographic signature on each message.

Create the CNAME records at your domain provider
- In your domain provider’s DNS management, perform record creation:
- Type: CNAME record
- Name/Host: paste the host value (for example, k1._domainkey.yourdomain.com for CNAME 1 and k2._domainkey.yourdomain.com for CNAME 2; your exact host values may differ).
- Points to/Target: paste the value field exactly as provided by Mailchimp.
- Save changes to update DNS records. The Domain Name System may take time to propagate; record validation by Mailchimp can take a few minutes up to 24-48 hours depending on TTL and your mail server caches.
Step 3: Publish or update your SPF record to include Mailchimp and avoid the 10-lookup limit
SPF fundamentals and the 10-lookup rule
- SPF is published as a TXT record at your root domain (for example, yourdomain.com). A typical value starts with v=spf1 followed by mechanisms and ends with ~all or -all.
- SPF evaluation has a strict 10‑DNS‑lookup limit. Exceeding it breaks SPF, which harms sender authentication, email delivery, and DMARC alignment. Consolidate includes and remove unused vendors to stay within the limit.
Add Mailchimp safely to your SPF policy
- For many standard Mailchimp marketing sends, DKIM via CNAME record is sufficient and SPF may not be required. However, if Mailchimp’s authentication instructions specify SPF for your plan, or you use Mailchimp Transactional, you must include the proper mechanism.
- For a transactional account using Mailchimp Transactional (formerly Mandrill), include the mechanism provided by Mailchimp (commonly include:spf.mandrillapp.com) in your SPF TXT record. Example:
- v=spf1 include:spf.mandrillapp.com include:spf.protection.outlook.com -all
- If Mailchimp provides a different include in your account UI, follow those exact instructions to authenticate your domain without exceeding the 10‑lookup limit. When you update DNS records, re-check record validation in Mailchimp after propagation.
Step 4: Create an initial DMARC record (p=none) with rua/ruf, adkim/aspf, pct, and tags
Choose reporting endpoints for visibility
- Aggregate reporting (rua) provides daily XML summaries of authentication outcomes across all sources. Use a dedicated mailbox like dmarc-reports@yourdomain and ensure email domain verification on that mailbox so it can receive large volumes.
- Forensic reporting (ruf) can send near-real-time samples of failed messages. Because these can include message headers and sometimes redacted bodies, route ruf to a restricted mailbox and confirm domain ownership and access controls.
Aggregate report setup (rua)
- Create an inbox with high storage and filtering. If you use Entri or another provider that supports automatic authentication and parsing, add their reporting address with the required mailto URI. Example: rua=mailto:dmarc@reports.yourdomain,mailto:collector@entri.example.
- Ensure DNS record size limits aren’t exceeded when listing multiple destinations.
Forensic report considerations (ruf)
- Not all receivers (e.g., Gmail) send ruf. Expect variability in volume.
- Secure the mailbox and alert your support team about potential PII handling.
Step 5: Validate authentication and alignment with headers and testing tools
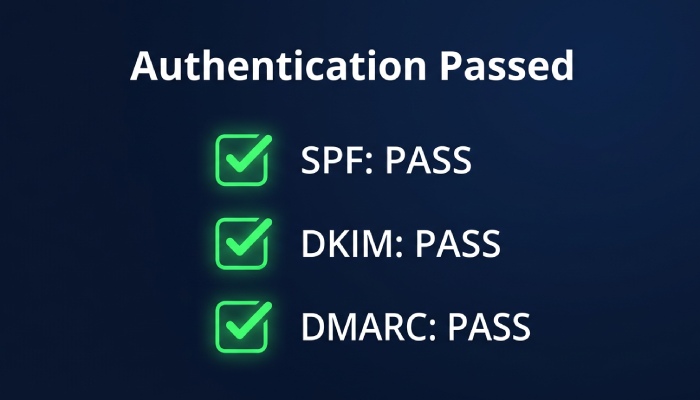
Confirm SPF, DKIM, and DMARC pass on live messages
- Send test messages to Gmail and Yahoo and open the raw headers. Look for Authentication-Results indicating DKIM=pass, SPF=pass, and DMARC=pass. Ensure sender authentication aligns with the visible From domain.
- For each email sender and platform (e.g., Entri, Mailchimp, Mailchimp Transactional), confirm the DKIM domain key (d=) and SPF Return-Path align with your authenticated domain.
Header checks in common webmail
- Gmail: Show original to see SPF, DKIM, and DMARC.
- Yahoo: View raw message to inspect Authentication-Results and alignment with the campaign from field. AutoSPF helps simplify email authentication by automatically optimizing your SPF records to prevent delivery issues.
Use testing suites and external recipients
- Validate with third-party tools that analyze DNS record configuration, DKIM signatures, and DMARC alignment. Send to external recipients and seed lists to simulate real routing.
Step 6: Monitor DMARC aggregate reports, interpret results, and fix misaligned sources
Read aggregate (RUA) XML and map sources
- Aggregate reports group sending IPs and domains by authentication status. Identify authorized sender systems versus unknown or shadow IT.
- Track which DNS record changes correlate to improvements in email delivery and spam prevention.
Categorize traffic by platform
- Tag traffic from Entri, Mailchimp, Mailchimp Transactional, Amazon Web Services (SES), and your email hosting services. Confirm each has DKIM signing and appears as an authenticated domain in their UI with an authenticated label and good authentication status.
- Note email bounces and volume per source to target remediation.
Remediate misalignment systematically
- For each failing source: authenticate your domain with that platform, add required CNAME record and TXT record entries for DKIM, and verify domain ownership.
- If SPF is used, ensure the platform is included in your SPF TXT record and that envelope-from aligns.
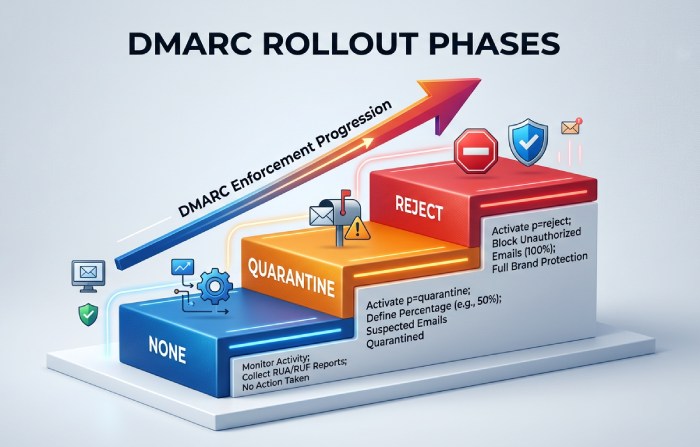
Step 7: Safely move from monitoring to enforcement (quarantine/reject) with a rollout plan
Phased policy ramp
- Move from p=none to p=quarantine, then to p=reject while increasing pct in steps (e.g., 25% → 50% → 100%).
- Use rua data to ensure all authorized senders are aligned before each step to avoid unintended email bounces.
Sample rollout
- Week 1-2: p=quarantine; pct=25
- Week 3-4: p=quarantine; pct=100
- Week 5-6: p=reject; pct=25 → 50 → 100 after confirming stable authentication status
Subdomain and org policy nuances
- Consider sp= for subdomain policy. If transactional email uses a subdomain (e.g., mail.yourdomain), enforce separately.
- Tighten adkim/aspf to s when all sources sign with matching domains for stronger phishing protection.
Measure impact and communicate
- Monitor reputation, external recipients’ complaint rates, and email delivery metrics. Notify internal stakeholders and the support team before policy changes.
Topics
Brad Slavin
General Manager
Founder and General Manager of DuoCircle. Product strategy and commercial lead for AutoSPF's 2,000+ customer base.
LinkedIn Profile →