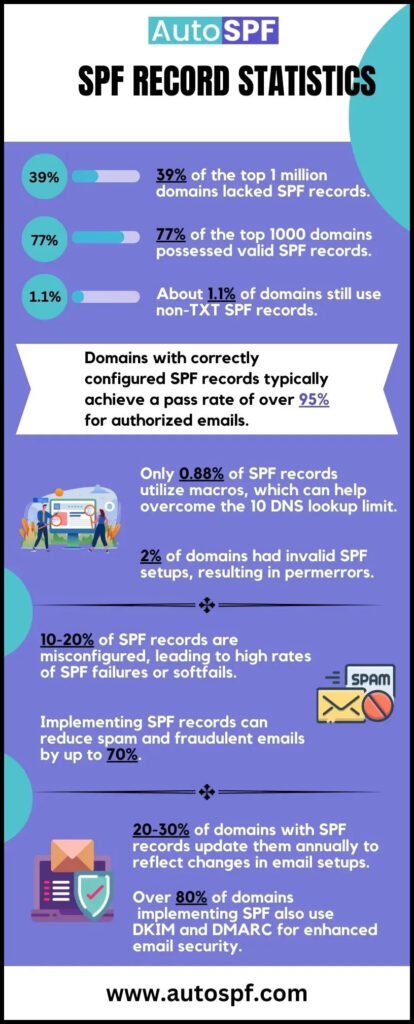
SPF records, as you may be aware, are like the bouncers of your email servers. They’re the DNS records that explicitly specify which email servers are officially allowed to send emails on behalf of your brand. By defining this list, domain owners keep out the riff-raff, preventing unauthorized people from sending emails that could tarnish your brand’s reputation.
You can create an SPF record using online tools or do it manually. This blog guides you on the latter way.
Steps to Manually Create an SPF Record
Here’s what you need to do-
Step 1: Assess Your Current Email Infrastructure
Before you start with the process of creating an SPF record, understand your organization’s email infrastructure. Know which all email servers and third-party services are used for sending emails on behalf of your domain. These may include your own mail servers, marketing automation platforms, CRM systems, and other services that send emails using your domain.
Step 2: Determine Your SPF Policy
Decide which SPF policy will be best suited for your expectations from SPF security. You can pick from one of the following SPF mechanisms–
- ‘include’ Mechanism: Specifies additional domains authorized to send emails on behalf of your domain.
- ‘a’ Mechanism: Authorizes specific IPv4 addresses.
- ‘mx’ Mechanism: Authorizes the MX (Mail Exchange) records of your domain.
Step 3: Define Your SPF Record Syntax
Once you’ve determined your SPF policy, it’s time to construct your SPF record using the appropriate syntax. SPF records are TXT records published in the DNS zone file of your domain. Here’s an example of SPF record syntax:
v=spf1 <mechanism>:<value> <mechanism>:<value>Replace <mechanism> and <value> with the appropriate SPF mechanisms and values based on your chosen policy.
Step 4: Create and Publish Your SPF Record
Access your domain’s DNS management interface provided by your domain registrar or hosting provider. Locate the DNS settings section and add a new TXT record with the following information:
- Hostname/Name: Your domain name (e.g., example.com).
- TTL (Time To Live): The time it takes for changes to DNS records to propagate, typically measured in seconds.
- Value/Text: Your SPF record syntax created in the previous step.
Save the changes, and your SPF record will be published in the DNS.

Monitoring
Once you have created an SPF record, your job is not done. You need to monitor email deliverability and investigate any issues with email rejection or delivery failure. We suggest that you regularly run your record through an online SPF lookup tool that highlights existing configurational and syntactical errors.
Pair Up With DKIM and DMARC For Optimum Fortification Against Phishing and Spoofing!
SPF works best when complemented with DomainKeys Identified Mail (DKIM) and Domain-based Message Authentication, Reporting, and Conformance (DMARC). DKIM adds a digital signature to emails, while DMARC provides policy enforcement and reporting capabilities.
DMARC also instructs recipients’ servers on how to deal with illegitimate and unsolicited emails sent from your domain. You can choose to instruct them to take no action, mark them as spam, or reject them. For any SPF-related issues, contact AutoSPF.com.


