Campaign Monitor SPF: How to Add Campaign Monitor to Your SPF Record

Quick Answer
Campaign Monitor SPF helps authenticate emails sent through Campaign Monitor and improve deliverability. Learn how to add Campaign Monitor to your SPF record, avoid configuration errors, and ensure your domain is properly authenticated.
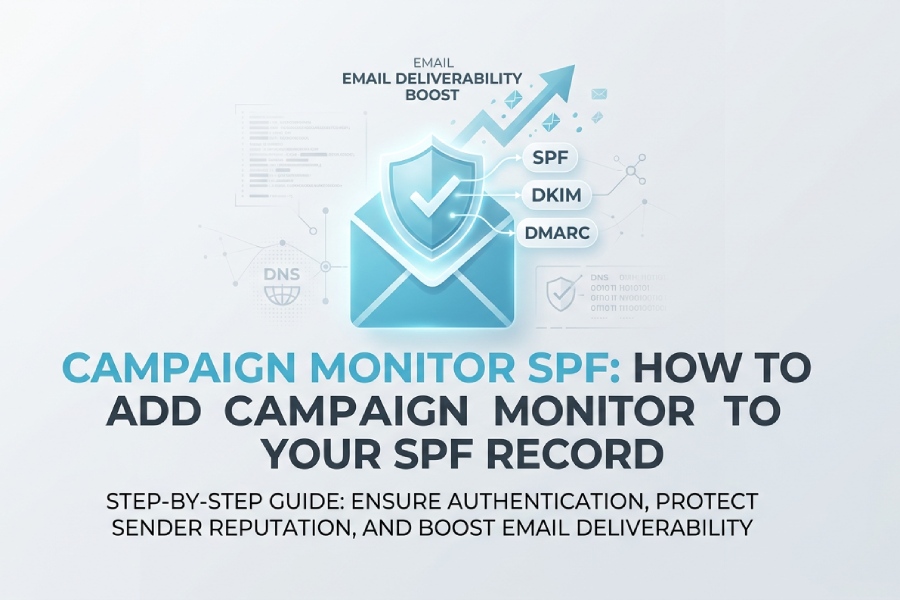
SPF, or Sender Policy Framework, is an email authentication protocol that tells receiving mail servers which systems are allowed to send email for your domain. A properly published SPF record helps mailbox providers such as Google verify that outbound email claiming to come from your sender domain is legitimate. For Campaign Monitor users, campaign monitor SPF is part of a broader email authentication strategy that also includes DKIM, DMARC, domain authentication, and sender authentication.
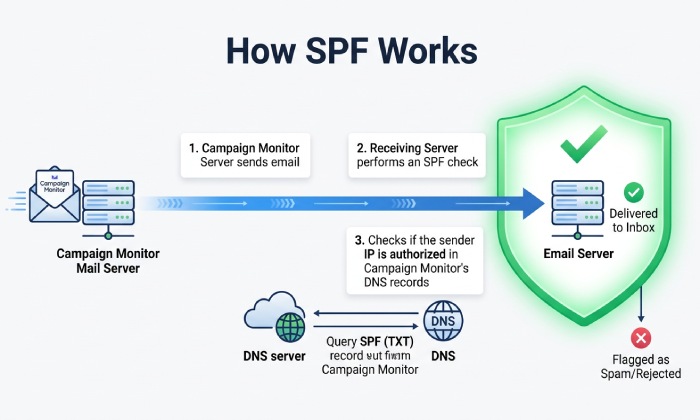
An SPF record is published in DNS as a TXT Record. When you send emails with Campaign Monitor, the recipients Email Server checks the SPF TXT record for your domain and evaluates whether Campaign Monitors Mail Servers are authorized. If the SPF configuration is missing, malformed, or too restrictive, you may see an SPF error, failed SPF authentication, or reduced email deliverability.
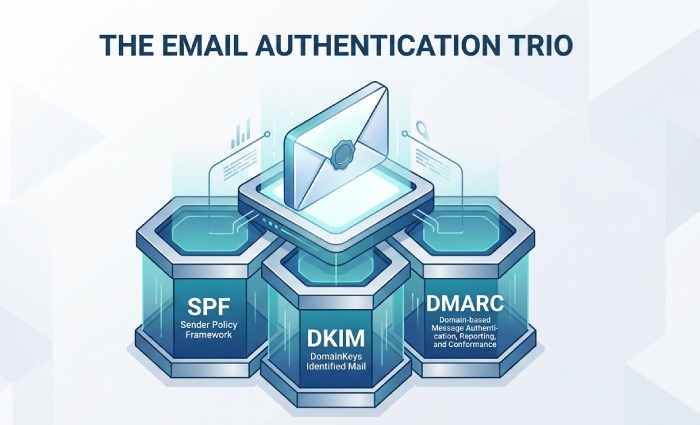
SPF matters because it helps protect email from abuse. Alongside DKIM and DMARC, SPF can help prevent email spoofing, reduce phishing risk, and improve trust in your legitimate marketing campaigns. This is especially important for brands using Campaign Monitor as an Email Service Provider for newsletters, product announcements, customer journeys, and Marketing Automation. If you send from a dedicated subdomain, our guide to configuring subdomain SPF covers that setup.
Campaign Monitor SPF Requirements and the Correct Include Mechanism
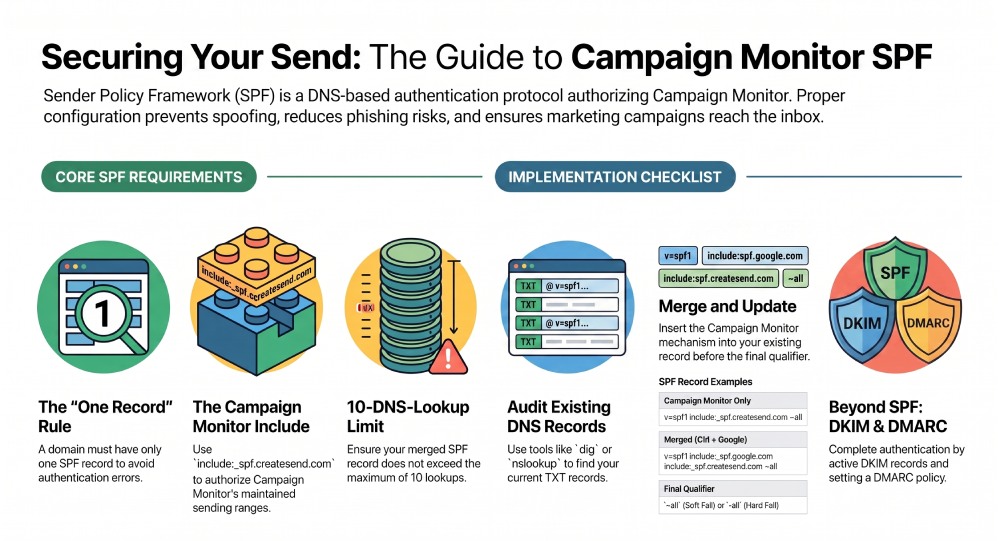
Campaign Monitor recommends adding include:_spf.createsend.com to your domain’s SPF record. If you already have an SPF record, add the include to the existing record rather than creating a second SPF record.
include:_spf.createsend.com
A typical SPF record example may look like this:
v=spf1 include:_spf.createsend.com ~all
In this SPF record value, v=spf1 is the SPF version, include:_spf.createsend.com is the SPF mechanism that authorizes Campaign Monitor, and ~all is a soft fail policy. The SPF allow behavior means that messages sent through Campaign Monitors approved infrastructure can pass SPF, while unauthorized senders are treated according to the final qualifier.
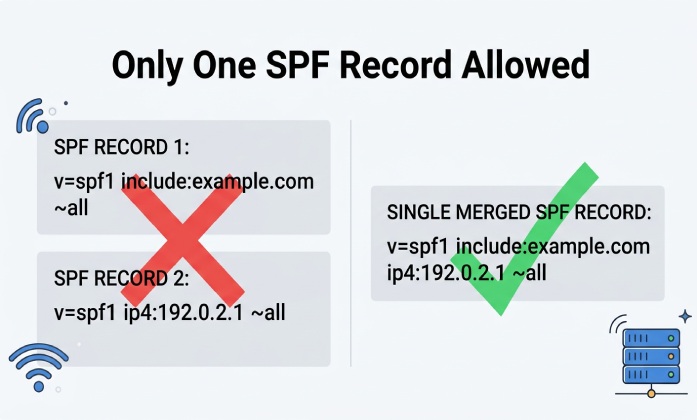
If you already use other senders, such as Google Workspace, a CRM, a help desk, or another Email Service Provider, do not create a second SPF DNS record. A domain must have only one SPF record. Instead, update SPF record content by merging all authorized services into a single SPF TXT record. For example:
v=spf1 include:_spf.google.com include:_spf.createsend.com ~all
This is where careful SPF syntax matters. Multiple SPF records can cause an SPF error, and too many DNS lookups can break SPF validation. The Sender Policy Framework allows a maximum of 10 DNS lookups, so each SPF include, redirect, or nested include should be reviewed. A bloated SPF configuration can harm email deliverability even if the intent is correct. An SPF record generator tool can build a clean, single record for you.
Campaign Monitor does not usually require you to list a static SPF IP address, because the include mechanism references Campaign Monitors maintained sending ranges. This makes SPF for Campaign Monitor easier to manage: instead of tracking changing IP ranges, you use the Campaign Monitor SPF include. Still, SPF troubleshooting is important after any DNS Management change because propagation delays, syntax mistakes, or duplicate records can cause failed SPF verification.
How to Check Your Existing SPF Record Before Making Changes
Before you add SPF record content for Campaign Monitor, check whether your domain already has an SPF record. You can do this from your DNS provider, through command-line tools, or by using an SPF check tool from EasyDMARC or similar Deliverability Tools.
In your DNS settings, look for a TXT Record at the root domain, often represented as @. You may see an SPF DNS record like:
v=spf1 include:_spf.google.com include:_spf.createsend.com ~all
If the domain already has an SPF record, you should update SPF record content rather than creating another one. If there is no SPF record, you can set up an SPF record from scratch using the correct campaign monitor SPF include.
For a quick technical check, you can use:
dig TXT example.com
or:
nslookup -type=TXT example.com
For additional verification, use an SPF lookup or validation tool to check whether your Campaign Monitor SPF configuration is published correctly. Look for duplicate SPF records, syntax errors, missing mechanisms, and excessive DNS lookups. You can also use dig or nslookup to inspect the published TXT records directly.
What to Look For During SPF Validation
During SPF validation, confirm the following:
- Your SPF record starts with the correct SPF version: v=spf1.
- Your SPF configuration includes Campaign Monitor: v=spf1 include:_spf.createsend.com ~all
- You have only one SPF TXT record for the sender domain.
- Your SPF setup does not exceed the 10-DNS-lookup limit.
- Your final mechanism, such as ~all or -all, matches your risk tolerance.
- Your DMARC configuration and DMARC policy are aligned with your authentication maturity.
- Your DKIM setup and campaign monitor DKIM records are also active.
This review is a core part of email authentication troubleshooting. If SPF passes but DMARC fails, the issue may be SPF alignment rather than SPF authentication itself. DMARC checks whether SPF or DKIM aligns with the visible From domain. That is why campaign monitor authentication should include both campaign monitor SPF and campaign monitor DKIM, supported by a correct dkim configuration and ongoing dkim troubleshooting when needed.
Step-by-Step Guide to Adding Campaign Monitor to Your SPF Record
Use this step by step SPF configuration guide to add Campaign Monitor safely.
-
Open your Campaign Monitor authentication settings Log in to Campaign Monitor and navigate to the area for domain authentication or manage your own authentication. The Campaign Monitor guide will show the DNS records required to authenticate your email, including campaign monitor DKIM records and any recommended SPF setup.
-
Review your current DNS settings Go to your DNS host, registrar, or DNS Management platform. In your domain settings, locate the existing SPF record. It will be a TXT Record beginning with v=spf1. If you cannot find one, you will create a new SPF TXT record.
-
Add the Campaign Monitor SPF include If you already have an SPF record, add the Campaign Monitor SPF include statement before the final all mechanism. For example, change:
v=spf1 include:_spf.google.com include:_spf.createsend.com ~allIf no SPF record exists, create this SPF record value:
v=spf1 include:_spf.createsend.com ~all -
Save the SPF DNS record Save the updated TXT Record in your DNS provider. DNS propagation can take minutes or several hours. During this period, SPF verification may not pass immediately.
-
Complete the DKIM setup Do not stop at SPF. Add DKIM record values from Campaign Monitor, including the DKIM Public Key if provided. Campaign monitor DKIM is essential for strong campaign monitor authentication, DMARC alignment, and email deliverability. If the dkim configuration does not validate, use dkim troubleshooting tools to confirm the host name, selector, and record value.
-
Verify SPF and DKIM Return to Campaign Monitor and verify SPF, campaign monitor DKIM, and domain verification status. You can also run an external SPF check through EasyDMARC. This confirms that your SPF configuration is live and that your campaign monitor SPF setup is visible to receiving mail servers.
-
Configure DMARC Add a DMARC record if you do not already have one. A basic dmarc setup can start with monitoring mode:
v=DMARC1; p=none; rua=mailto:*dmarc*@example.comOver time, analyze reports, improve email authentication, and move toward a stronger DMARC policy such as quarantine or reject. Proper dmarc configuration helps protect email, prevent email spoofing, and strengthen email security.
-
Monitor deliverability and authentication results After you send emails with Campaign Monitor, review headers, DMARC reports, and deliverability metrics. If you see SPF error messages, failed SPF validation, or DMARC failures, revisit your SPF configuration, campaign monitor authentication, dkim setup, and manage your own authentication records. Continuous email authentication troubleshooting is the best way to maintain reliable email deliverability across Campaign Monitor campaigns.
General Manager
General Manager of DuoCircle. Product strategy and commercial lead for AutoSPF's 2,000+ customer base.
LinkedIn Profile →