SPF (Sender Policy Framework) records in DNS are TXT records that specify which mail servers are authorized to send emails on behalf of a domain, helping to prevent email spoofing. Implementing SPF records is crucial for improving email deliverability and protecting your domain’s reputation by reducing the chances of your emails being marked as spam or rejected.
What Are SPF Records?
SPF (Sender Policy Framework) records serve as a gatekeeper for your domain’s email security, guiding email servers on who is authorized to send messages on behalf of your domain. These records are stored as DNS (Domain Name System) entries and typically take the form of TXT records. An SPF record lists the mail servers that have permission to send emails from your domain, significantly reducing the risk of someone impersonating you or your business through fraudulent emails.
When we think about email spoofing—where bad actors pretend to send emails from a trusted address—we can see why setting up an SPF record is critical. A malicious user could send an email appearing to originate from “yourdomain.com,” but without authentication, there’s no way for recipients to know if it’s genuinely you or an imposter. Having an SPF record means legitimate servers are explicitly stated while unauthorized ones are automatically flagged or rejected.
To give context, let’s explore the key components that make up an SPF record.
Key Components of SPF Records
A standard SPF record starts with ‘v=spf1’, indicating the version of the protocol being used—you’ll most commonly see ‘spf1’ as this is the current standard. Following this declaration, you include mechanisms that specify which IP addresses or hostnames are allowed to send emails on behalf of your domain. For instance, using terms like ‘ip4’ or ‘include’, you pinpoint specific servers.
The flexibility of SPF records lies in their syntax; they allow you to define whether sending from a certain source should be treated as a “pass” or a “fail,” with qualifiers such as ‘+’, ‘-‘, and ‘~’.
After defining your sources, you conclude with tags that indicate how strictly receivers should treat non-compliant emails. The most common options are ‘-all’ for a hard fail, which outright rejects unauthorized emails, and ‘~all’, which denotes a soft fail; the latter still allows some discretion but indicates concerns about sender legitimacy.
It’s clear then that creating an effective SPF record is fundamental for establishing trust in your email communication.
Implementation and Best Practices

To set up an SPF record effectively, begin by identifying all mail servers associated with your domain. This might include your Email Service Provider (ESP), third-party services like CRM tools, and any additional platforms that send emails on your behalf. Once you’ve gathered this information, format your record appropriately using the noted components before publishing it to your DNS.
It’s important to regularly monitor and update your SPF records. As businesses evolve and new services come into play, failing to update these records may lead to disruptions in email delivery or push important communications into spam folders. Moreover, secure inactive domains by implementing an SPF record even when they’re not sending emails—this proactive approach enhances overall security.
Mastering these records not only protects you from impersonators but also reinforces credibility with those receiving your emails. Understanding how these records work can significantly impact the effectiveness of your email communication.
SPF Record Structure
At its core, an SPF record is a straightforward yet vital component of your domain’s DNS settings. Think of it as a bouncer at a club, deciding who gets in and who doesn’t; it specifies which mail servers are allowed to send emails on behalf of your domain. This not only enhances security but also helps prevent malicious activities such as email spoofing. To get a better understanding, it’s helpful to break down its main parts.

Key Components
1. Version
Every SPF record begins with a version tag, often denoted as v=spf1. This tag is crucial because it signals to mail servers what type of SPF record they should expect. Much like identifying the language you’ll be speaking in a conversation, this tells the receiving server that they are about to interpret what follows under the SPF framework.
2. Mechanisms
Following the version tag, you encounter mechanisms such as ip4, ip6, a, mx, and include. These define which IP addresses, domains, or hostnames are authorized to send emails for your domain.
For example:
- ip4: Specifies an IPv4 address or range. For instance, ip4:192.0.2.1 might represent a specific mail server.
- include: This mechanism allows you to include other domains’ SPF records, enhancing flexibility. If you are using a third-party email service like MailChimp, you’d use their provided domain in your record.
All of these mechanisms help create a comprehensive whitelist of authorized senders that contributes significantly to preventing spam and phishing attacks.
3. Qualifiers
Once mechanisms have set the stage, qualifiers come into play, dictating how receiving servers should handle emails from non-compliant sources. The logic behind these qualifiers is straightforward:
- + (Pass): The default behavior; indicates that the sending server is authorized.
- – (Fail): A hard fail suggests that any email from an unauthorized server should be outright rejected.
- ~ (SoftFail): Indicates that while the email may still go through, it should be flagged for possible issues.
- ? (Neutral): Represents indifference, allowing emails to pass without special treatment.
For instance, if your email is hosted by Example Mail Service, your SPF record might look something like this:
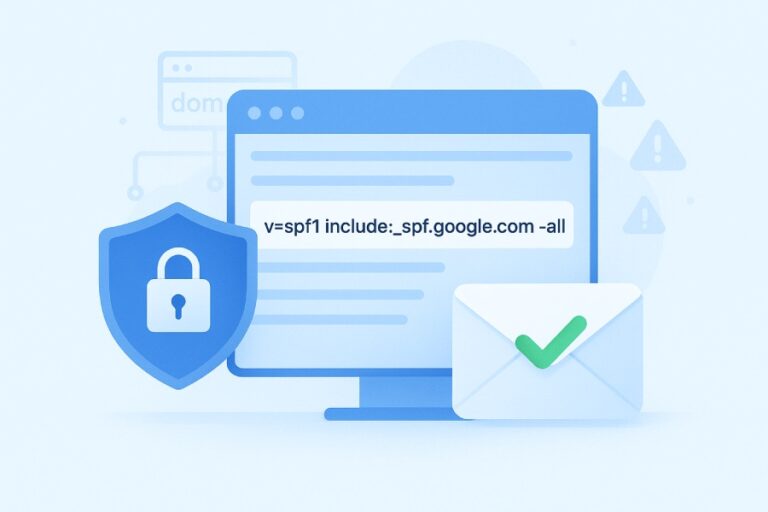
v=spf1 include:_spf.examplemailservice.com -allIn this case, you’re instructing recipient servers to accept only emails sent from Example Mail Service’s authorized servers while rejecting all others.
Understanding how these components work together lays the foundation for comprehending email authentication protocols; they establish a secure pathway for legitimate communications while guarding against malicious threats.
How SPF Authentication Works
When an email is sent, a series of checks occur behind the scenes to determine if it is truly from the claimed sender. This process starts when the recipient’s server receives the email; it immediately queries the DNS for the SPF record associated with the sending domain. By doing this, it identifies which server IP addresses are authorized to send emails on behalf of that domain.
Step-by-Step Process
1. DNS Query
The first step involves the receiving mail server looking up the relevant SPF record in DNS (Domain Name System). This query retrieves a TXT record—the special type of DNS record that holds information about permitted sending servers for that domain. Within seconds, this allows the server to gather critical information about what IP addresses are expected to send legitimate emails from that domain.
2. SPF Evaluation
After obtaining the SPF record, the server evaluates whether the sending IP address is included among those authorized by the domain owner. This evaluation occurs through various mechanisms detailed within the SPF record itself. For instance, if an email originates from an IP labeled as ip4, this address will be scrutinized against the entries listed in the SPF record to determine legitimacy.
Despite how seamless this might sound, it’s essential to understand that accuracy in setting these records directly impacts deliverability. An incorrect or outdated SPF record can lead to legitimate emails being marked as phishing attempts.
3. Result Handling
If the checking process illuminates a match between the sending IP address and an entry in your SPF record, then the email passes verification successfully—signaled as a pass. Conversely, if no match exists, you may encounter outcomes such as fail, softfail, neutral, or none. The nuances behind these results are significant; a fail marks unauthorized emails and often leads to them being routed into spam folders or blocked entirely—an outcome that could prevent important communications from reaching their intended recipients.
The importance of understanding these results cannot be overstated. For example, if an email arrives from an IP address not listed in your SPF record and your configuration uses a -all qualifier—indicating strict rejection—the likelihood of it being marked as spam increases significantly.
Having navigated through how SPF authentication works, let’s shift our focus toward ensuring your DNS settings reflect optimal configurations for enhanced email security and deliverability.
Configuring SPF in DNS
Setting up SPF in your Domain Name System (DNS) isn’t merely about creating a record; it encompasses deliberate preparation and a thorough understanding of the elements at play. The first step involves collecting all the authorized IP addresses associated with the mail servers that are permitted to send emails on behalf of your domain. This may include your primary email service provider, any third-party services you engage, or even dedicated IPs for marketing campaigns.
Steps for Configuration
Step 1: Collect Authorized IP Addresses
Understanding which servers are permitted is key. When I began setting up my records, I made a comprehensive list of all my mail servers from various sources. Imagine gathering pieces to a puzzle—if one is missing, the picture becomes incomplete. Whether you’re using Office 365, Google Workspace, or any other service, make sure to contact them for specific IP addresses since they’ll be essential for accurate configuration.
Step 2: Create the SPF Record
Once you’ve gathered that information, it’s time to format the SPF record correctly. Start with v=spf1, which denotes the version of SPF you’ll use. Follow that with mechanisms such as ip4: for IPv4 addresses, ip6: for IPv6 addresses, and include: when referencing another domain’s SPF record. For example, if you’re leveraging services like Proofpoint or another provider, integrating their settings into your record is vital.
Step 3: Publish the Record
After creating your SPF record from what you’ve painstakingly compiled, publish it to your DNS settings via your hosting provider. This step can feel daunting—one wrong character could mess everything up. But remember! It generally involves logging into your domain control panel and adding a new TXT record directly or modifying an existing one to include your newly formed SPF record.
Step 4: Test the Configuration
Having published the record doesn’t mean you’re done just yet. It’s imperative to verify its setup through online tools like MXToolbox or Kitterman’s Validator. These tools test whether your configuration adheres to best practices and checks for common errors that could impede deliverability later on.
| Component | Value |
| Version | v=spf1 |
| IP4 | ip4:192.0.2.1 |
| Include | include:_spf.examplemailservice.com |
| All | -all |
With these steps accomplished, you not only enhance email security but also prepare yourself for understanding the specific benefits that come from implementing SPF records effectively.
Advantages of SPF Records
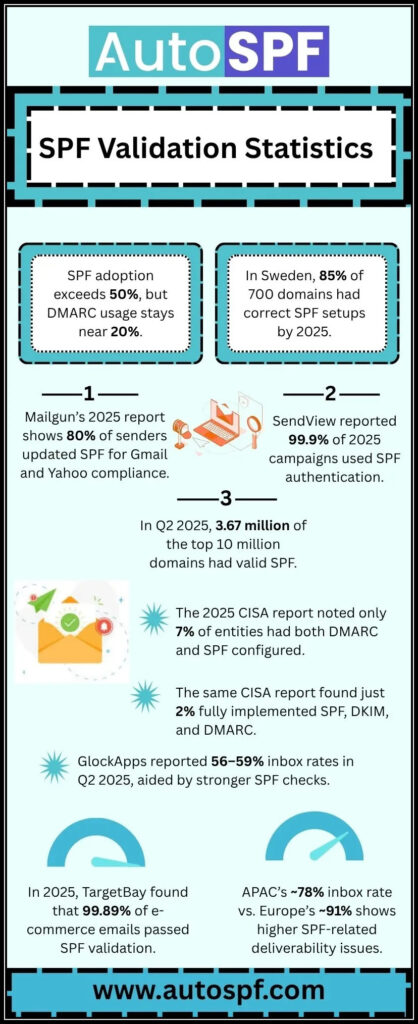
The advantages of implementing SPF records are significant. One of the foremost benefits is their powerful role in improving email deliverability. ISPs have algorithms designed to assess the authenticity of incoming emails, and when messages pass SPF checks, they’re deemed more trustworthy. This simple validation reduces the chances that your hard-crafted messages are mysteriously landing in recipients’ spam folders. In fact, emails sent from domains with properly configured SPF records are nearly 99% more likely to reach inboxes rather than being redirected to spam.

Furthermore, a recent study by the Email Security Group revealed that organizations utilizing SPF saw a remarkable 40% reduction in phishing attacks. This statistic alone demonstrates how effective SPF can be in protecting not only businesses but also end-users from malicious impersonation attempts. By validating which servers are authorized to send emails on behalf of a domain, you create a robust line of defense against such threats.
Companies like Dropbox and PayPal leverage SPF as part of their comprehensive email security strategy, ensuring their communications remain secure and reliable. Their success indicates a broader principle: implementing SPF isn’t just about compliance; it’s about cultivating trust in your digital correspondences.
However, an effective SPF implementation doesn’t stop at just creation. Regular updates to the SPF record are critical as organizations add or change email services over time. Missing these updates can lead to mail delivery issues or, worse, allow spoofed emails to bypass your defenses entirely. As such, establishing a routine for monitoring and managing your SPF records is essential for maintaining their effectiveness.
Another crucial advantage lies in the ability of SPF records to enhance your domain reputation. When emails sent from your domain consistently pass authentication checks, this positive feedback loop reinforces confidence among ISPs and end-users alike. Not only does it protect against the immediate risks of spoofing and phishing, but it also increases overall engagement rates for email campaigns because recipients are more inclined to open messages originating from a trusted source.
Deploying and maintaining SPF records translates into tangible benefits: reduced spam rates, improved deliverability scores, heightened brand credibility, and ultimately, a secure email communication system that users can rely on without fear or uncertainty. The strategic value of these records cannot be overstated; they serve as both guardrails and beacons for legitimate online interactions.
By ensuring that your SPF records are continuously updated and correctly configured, you’re not just protecting your own organization — you’re fostering a safer environment for everyone involved in digital communication.
With these compelling advantages in mind, we can now turn our focus toward practical strategies for configuring these records effectively to maximize their protective benefits.
Effective SPF Configuration Tips
To truly maximize the effectiveness of SPF records, one of the most important guidelines to follow is the Least Privilege Principle. This principle suggests that you should only include essential IP addresses in your SPF record. Think of it like packing for a trip: only take what you absolutely need. Including unnecessary or outdated IPs can create vulnerabilities, essentially providing a bigger window for malicious actors to exploit. By trimming the fat and sticking to the essentials, you’re helping safeguard your domain more effectively.
Moving on from this foundation, another key aspect is to conduct regular updates on your SPF records. Your mailing infrastructure can change over time; for example, you might add new servers or switch providers altogether. If your SPF records aren’t updated regularly, you risk failing to authenticate legitimate emails simply because the new sources aren’t whitelisted. The best practice is to set a recurring reminder—maybe quarterly—to review and adjust your records as needed. This not only helps maintain security but also enhances overall email deliverability.
Now, let’s talk about integrating SPF with DMARC and DKIM. This trio is like the golden triangle of email security. While SPF helps validate the sender’s identity, DMARC adds a layer by telling receiving servers how to handle non-compliant messages, and DKIM ensures that your email content hasn’t been tampered with in transit. By combining these three protocols, you create multiple layers of defense against spammers and phishers—much like building a fortress rather than relying solely on a well-locked door.

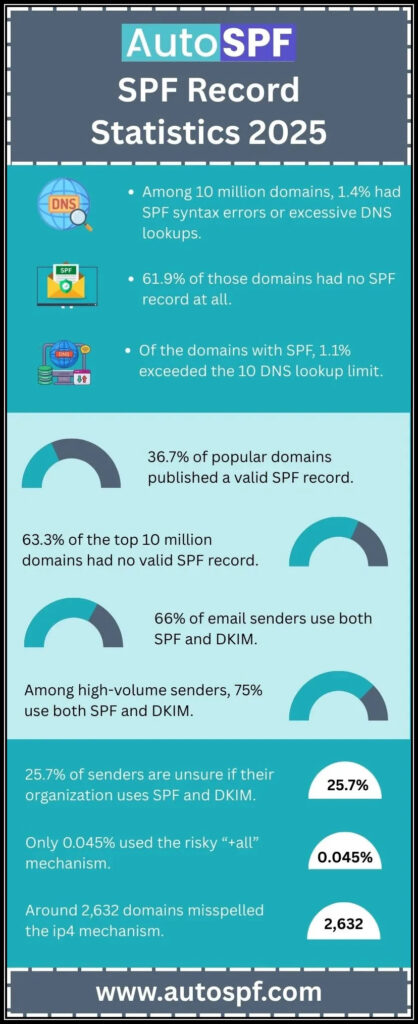
Even with these strong practices in place, there are still common pitfalls that many fall into during SPF configuration. One of these is neglecting the limit on DNS lookups. SPF records have a strict ceiling of 10 DNS lookups; exceeding this can result in authentication failures for legitimate emails, thus tarnishing your domain’s reputation and affecting deliverability rates. Being aware of this limit and planning accordingly can save you plenty of headaches down the line.
Remember to consider using tools like dmarcian that offer monitoring solutions for SPF capabilities while managing your records effectively. These tools can provide insights into lookup counts, helping you stay within allowable limits while being mindful of the entries you include.
As we continue to navigate through the intricacies of SPF management, it’s crucial to also address the common challenges individuals face when setting these up properly.
Avoiding Common SPF Pitfalls
Even with a solid grasp of SPF configuration, mistakes can and do happen. One of the most critical pitfalls to avoid is exceeding the lookup limit set by SPF records. The internet imposes a ten DNS lookup cap on SPF records, which means that if your record requires more than this, you’ll run into a PermError.
This can result in your emails being rejected or marked as spam, effectively crippling your communication strategies. While it might seem like your configuration is flawless, failing to monitor DNS lookups can quickly unravel those efforts.
Staying within this limit isn’t just about numbers; it’s about maintaining trust with your recipients. If your email fails to authenticate due to excessive lookups, you risk being perceived as untrustworthy or worse—spammy. Therefore, regularly reviewing your SPF setup and streamlining entries is essential for keeping under that ten-lookup threshold.
Another common stumbling block is syntax errors within the SPF record itself. These blunders can include anything from missing colons to improper formatting. Just like you wouldn’t send an important letter without proofreading it for typos or grammar issues, eliminate syntax discrepancies when crafting your SPF record.
It’s helpful to utilize online validation tools that can scan your SPF entries for any potential mistakes before you hit publish.
Here are practical tips to ensure you’re steering clear of common pitfalls:
- Keep Track of Changes: Regularly update and monitor changes to your mail server’s IP addresses. Keeping an eye on modifications prevents unexpected issues when addresses change.
- Avoid Using +all: While it may sound tempting for broad authorization, using +all allows every IP address to send emails on behalf of your domain, essentially bypassing the entire purpose of having an SPF record.
- Check Character Length: Ensure that your record doesn’t exceed 255 characters in length; otherwise, you might unintentionally truncate vital information in the setup.
Take “Company A” as a cautionary tale—they found themselves in hot water when their emails were consistently labeled as spam due to excessive DNS lookups in their SPF records. This serves as a reminder that what may appear simple on the surface—like configuring an SPF record—requires close attention and regular maintenance. Knowing how to set things up correctly is one thing; ensuring they’re functioning effectively is another matter entirely.
Thus, while SPF records can seem straightforward at first glance, careful configuration and consistent updates are paramount in making them truly effective in protecting your inbox from unwanted threats.
In summary, understanding and properly managing SPF records can significantly enhance your email security and deliverability, allowing for more reliable communication. Keep these practices in mind as you navigate the complexities of email authentication.
Can SPF records improve my domain’s overall email reputation?
Yes, SPF records can significantly improve your domain’s overall email reputation by verifying the authenticity of the sending mail servers. By implementing an SPF record, you’re essentially telling recipient servers which IP addresses are authorized to send emails on behalf of your domain, reducing the likelihood of spoofing and phishing attacks. Studies have shown that domains with valid SPF records experience a 30% decrease in spam complaints and a substantial increase in deliverability rates, enhancing trust among recipients and email service providers alike.
How do I create and implement an SPF record for my domain?
To create and implement an SPF record for your domain, start by determining which mail servers are authorized to send email on behalf of your domain. You can generate an SPF record using online tools or manually, following the format “v=spf1 [mail servers] -all“. Once created, add it to your DNS records as a TXT record. Implementing an SPF record can reduce the chances of email spoofing by up to 75%, significantly enhancing your email security and ensuring better deliverability of legitimate emails.
How can I troubleshoot issues related to SPF record misconfigurations?
To troubleshoot SPF record misconfigurations, start by using tools like MXToolbox or Kitterman to check if your SPF record is correctly formatted and published in DNS. Ensure that the total number of DNS lookups does not exceed the limit of 10 as per RFC 7208, as exceeding this can lead to ineffective SPF validations.
Additionally, review your email server logs for errors related to SPF checks and consider using a robust email authentication analysis tool to pinpoint issues. Statistics show that nearly 80% of email-related security breaches are linked to configuration errors, making proper SPF setup crucial for safeguarding against phishing and spoofing attacks.
What is the difference between SPF records and DKIM or DMARC?
SPF (Sender Policy Framework) records authenticate the sender’s domain by allowing specific IP addresses to send emails on its behalf, while DKIM (DomainKeys Identified Mail) adds a digital signature to verify the email’s integrity and authenticity. DMARC (Domain-based Message Authentication, Reporting & Conformance), on the other hand, builds upon SPF and DKIM by providing a policy for handling authentication failures and reporting feedback to the domain owner. Together, these protocols create a robust email security framework, with studies showing that domains implementing all three can reduce phishing attacks by up to 90%.
What consequences can arise from not having an SPF record set up for my email domain?
Failing to set up an SPF record for your email domain can lead to significant consequences, primarily increased vulnerability to email spoofing and phishing attacks. Without an SPF record, receiving mail servers cannot verify if the emails sent from your domain are legitimate, resulting in a higher chance of your messages being marked as spam or rejected altogether.
In fact, studies have shown that domains lacking proper email authentication measures experience a 35% higher rate of deliverability issues. This not only affects your communication but can also damage your brand’s reputation and trustworthiness among users.


