DKIM OVH: A Complete Guide to Configuring SPF, DKIM, and DMARC

Quick Answer
DKIM OVH helps secure your domain and improve email deliverability. Learn how to configure SPF, DKIM, and DMARC records in OVH to authenticate outgoing emails, prevent spoofing, and protect your domain from phishing attacks.
Try Our Free DMARC Checker
Validate your DMARC policy, check alignment settings, and verify reporting configuration.
Check DMARC Record →
Email authentication plays an important role in protecting business domains from spoofing, phishing, and unauthorized email activity. Receiving mail servers use authentication protocols to verify whether messages come from legitimate sources and whether their content has been properly signed.
For businesses using OVHcloud email services, configuring SPF, DKIM, and DMARC helps establish domain authenticity and improve email security. These protocols work together to identify authorized senders, validate email signatures, and manage messages that fail authentication.
In this guide, we’ll explain how DKIM OVH configuration works, how to set up SPF and DMARC, and how to verify that your email authentication records are functioning correctly.
Understanding SPF, DKIM, and DMARC in OVHcloud
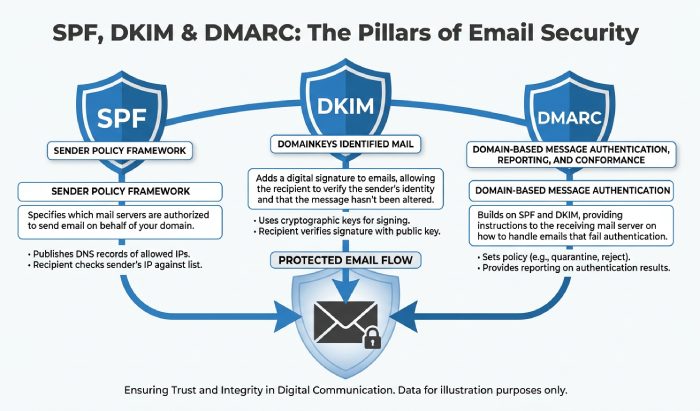
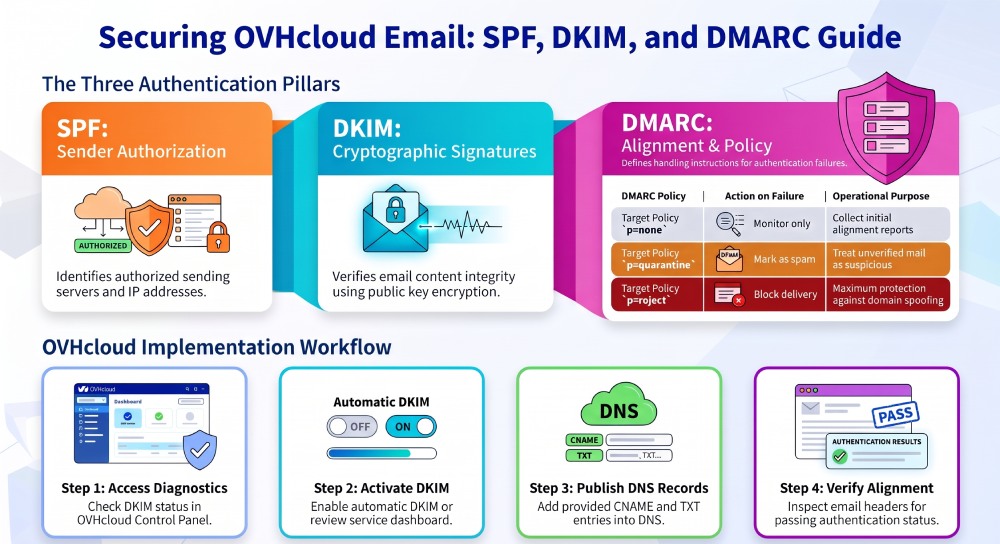
SPF, DKIM, and DMARC perform different but complementary functions.
- SPF (Sender Policy Framework): Identifies which mail servers and IP addresses are authorized to send emails on behalf of your domain.
- DKIM (DomainKeys Identified Mail): Uses cryptographic signatures to verify that an email was signed by an authorized domain and that its signed content has not been modified.
- DMARC (Domain-based Message Authentication, Reporting, and Conformance): Checks SPF and DKIM alignment and allows domain owners to specify how receiving servers should handle messages that fail authentication.
For OVHcloud users, implementing all three protocols provides a more complete email authentication setup than relying on a single method.
Why DKIM Configuration Matters for OVHcloud Email
DKIM adds a layer of verification to outgoing emails. It allows receiving servers to check a message’s digital signature against the public key published in the domain’s DNS records.
A correctly configured DKIM record provides several benefits:
- Email authenticity: Helps receiving servers verify the domain responsible for signing an email.
- Message integrity: Helps detect modifications to signed message content.
- Spoofing protection: Supports domain protection when combined with DMARC.
- Authentication visibility: Helps administrators investigate authentication failures through DMARC reports.
- Deliverability support: Contributes to a trustworthy email-sending setup, although it does not guarantee inbox placement.
Businesses using OVHcloud for professional communication should include DKIM in their broader email security strategy.
Prerequisites Before Configuring DKIM in OVHcloud
Before changing DNS settings, identify your email hosting service and confirm where your domain’s DNS records are managed.
OVHcloud offers several email solutions, including MX Plan, Email Pro, Exchange, and Zimbra. Configuration steps can vary depending on the service.
Make sure you have:
- Access to your OVHcloud Control Panel.
- Access to your domain’s DNS management.
- The domain associated with your email service.
- Details of existing SPF, DKIM, and DMARC records.
- Information about other platforms sending emails through your domain.
Remember that registering a domain with OVHcloud does not necessarily mean OVHcloud manages its DNS. If another provider hosts your DNS zone, publish the authentication records through that provider.
How to Configure DKIM for OVHcloud Email Services
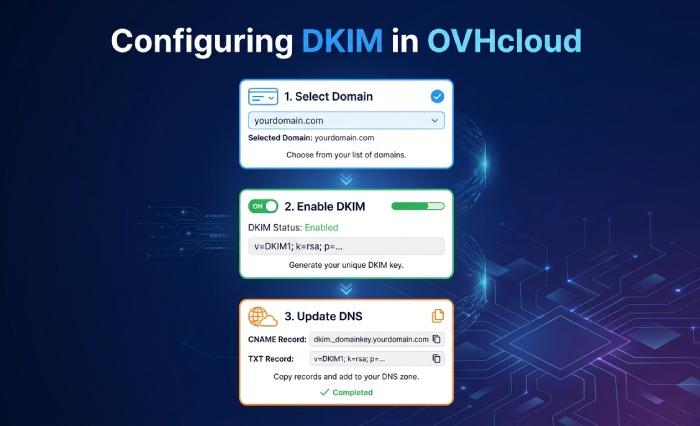
OVHcloud offers automatic DKIM configuration for supported managed email services. The exact activation process depends on your email product and DNS configuration.
Step 1: Access Your OVHcloud Email Service
Log in to your OVHcloud Control Panel and navigate to the email product associated with your domain.
For MX Plan:
- Open the Web Cloud section.
- Select MX Plan.
- Choose your domain.
- Open the General Information tab.
- Locate the DKIM status in the diagnostics section.
If DKIM is already enabled, check whether the configuration is reported as valid.
Step 2: Activate DKIM
- If DKIM is not configured, check whether the automatic activation option is available.
- For supported MX Plan services, you can select the DKIM status indicator and follow the activation instructions.
- For Email Pro and Exchange, review the domain settings in the relevant service dashboard. Zimbra users can check the Domain section and its DKIM diagnostics.
- Follow the instructions for your particular service because not every OVHcloud email product uses identical configuration methods.
Step 3: Publish the Required DNS Records
If OVHcloud cannot automatically update your DNS zone, it may provide the necessary DNS records.
Depending on the service, these may include CNAME records pointing to OVHcloud-managed DKIM selectors.
To add the records:
- Open Domain Names in the OVHcloud Control Panel.
- Select your domain.
- Navigate to the DNS Zone tab.
- Click Add an Entry.
- Select the record type specified by OVHcloud.
- Enter the supplied hostname and destination value.
- Save the changes.
Always use the exact values provided for your email service. Do not copy DKIM selectors or public keys from another domain.
Step 4: Verify DKIM Activation
Allow time for DNS changes to propagate. Then return to your email service dashboard and check the DKIM status.
You can also send a test email and inspect its original message headers. A successful DKIM result indicates that the receiving server could validate the message signature using the published public key.
How to Configure an SPF Record for OVHcloud
While DKIM verifies email signatures, SPF identifies authorized sending servers.
For standard OVHcloud shared email services, the documented SPF example is:
v=spf1 include:mx.ovh.com ~all
Before publishing this record, identify all services that send emails using your domain.
To configure SPF:
- Log in to your OVHcloud Control Panel.
- Open Web Cloud and select Domain Names.
- Choose your domain and open DNS Zone.
- Check whether an SPF record already exists.
- Add or update the record using the correct configuration.
- Save the changes and verify the published value.
Keep these considerations in mind:
- Maintain only one SPF record per sending domain.
- Include all legitimate sending services.
- Avoid unnecessary DNS lookup mechanisms.
- Stay within SPF’s 10 DNS lookup limit.
- Review existing records before replacing them.
If you use OVHcloud alongside third-party email platforms, combine their authorized sending sources into one valid SPF record.
How to Set Up DMARC for OVHcloud
DMARC checks whether SPF or DKIM authentication aligns with the visible From domain. It also allows domain owners to specify how receiving servers should handle authentication failures.
To begin monitoring, publish the following TXT record:
v=DMARC1; p=none; rua=mailto:dmarc@example.com
Replace the example email address with an address configured to receive aggregate DMARC reports.
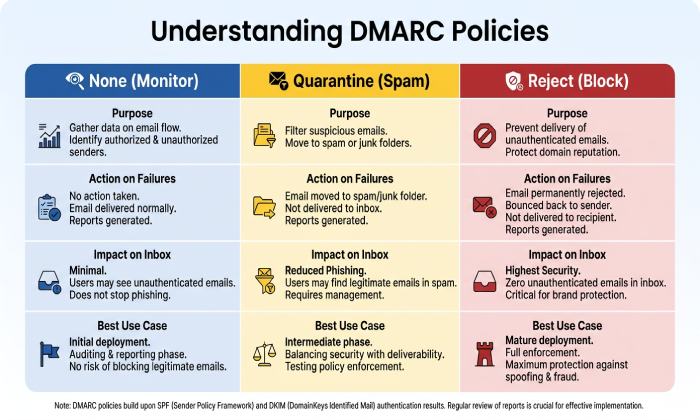
DMARC supports three main policies:
- p=none: Monitors authentication without requesting quarantine or rejection.
- p=quarantine: Requests that messages failing DMARC be treated as suspicious.
- p=reject: Requests that messages failing DMARC be rejected.
Starting with monitoring is generally a sensible approach. Review reports and confirm that legitimate sending services pass authentication and alignment checks before moving to a stricter policy.
How to Test SPF, DKIM, and DMARC Records
Publishing DNS records is only the first step. You should verify that receiving servers can retrieve them and authenticate outgoing messages.
1. Check DNS records
Use DNS lookup tools to inspect your published records.
For example:
dig TXT example.com
dig TXT _dmarc.example.com
For DKIM, query the actual selector:
dig TXT selector._domainkey.example.com
If your OVHcloud service uses CNAME-based DKIM selectors, check the supplied hostname for its CNAME record instead.
2. Send a test email
Send an email from your OVHcloud account to a mailbox where you can inspect the original message headers.
Review the Authentication-Results header for:
- SPF: PASS
- DKIM: PASS
- DMARC: PASS
A passing DMARC result also requires alignment with the visible From domain.
3. Review DMARC reports
Aggregate reports provide information about sending sources and authentication results. Review them regularly to identify unauthorized senders and configuration problems.
Common OVHcloud Email Authentication Problems
Some common authentication problems include:
- DKIM record not found: Check the selector, DNS record type, and DNS hosting provider.
- DKIM failure: Verify that the published record matches the values supplied by OVHcloud.
- SPF PermError: Check for multiple SPF records, syntax errors, and excessive DNS lookups.
- DMARC failure: Review SPF and DKIM alignment with the visible From domain.
- DNS propagation delays: Allow sufficient time for changes to become visible across DNS resolvers.
Identifying the actual cause is more effective than repeatedly changing DNS records without verification.
General Manager
General Manager of DuoCircle. Product strategy and commercial lead for AutoSPF's 2,000+ customer base.
LinkedIn Profile →